
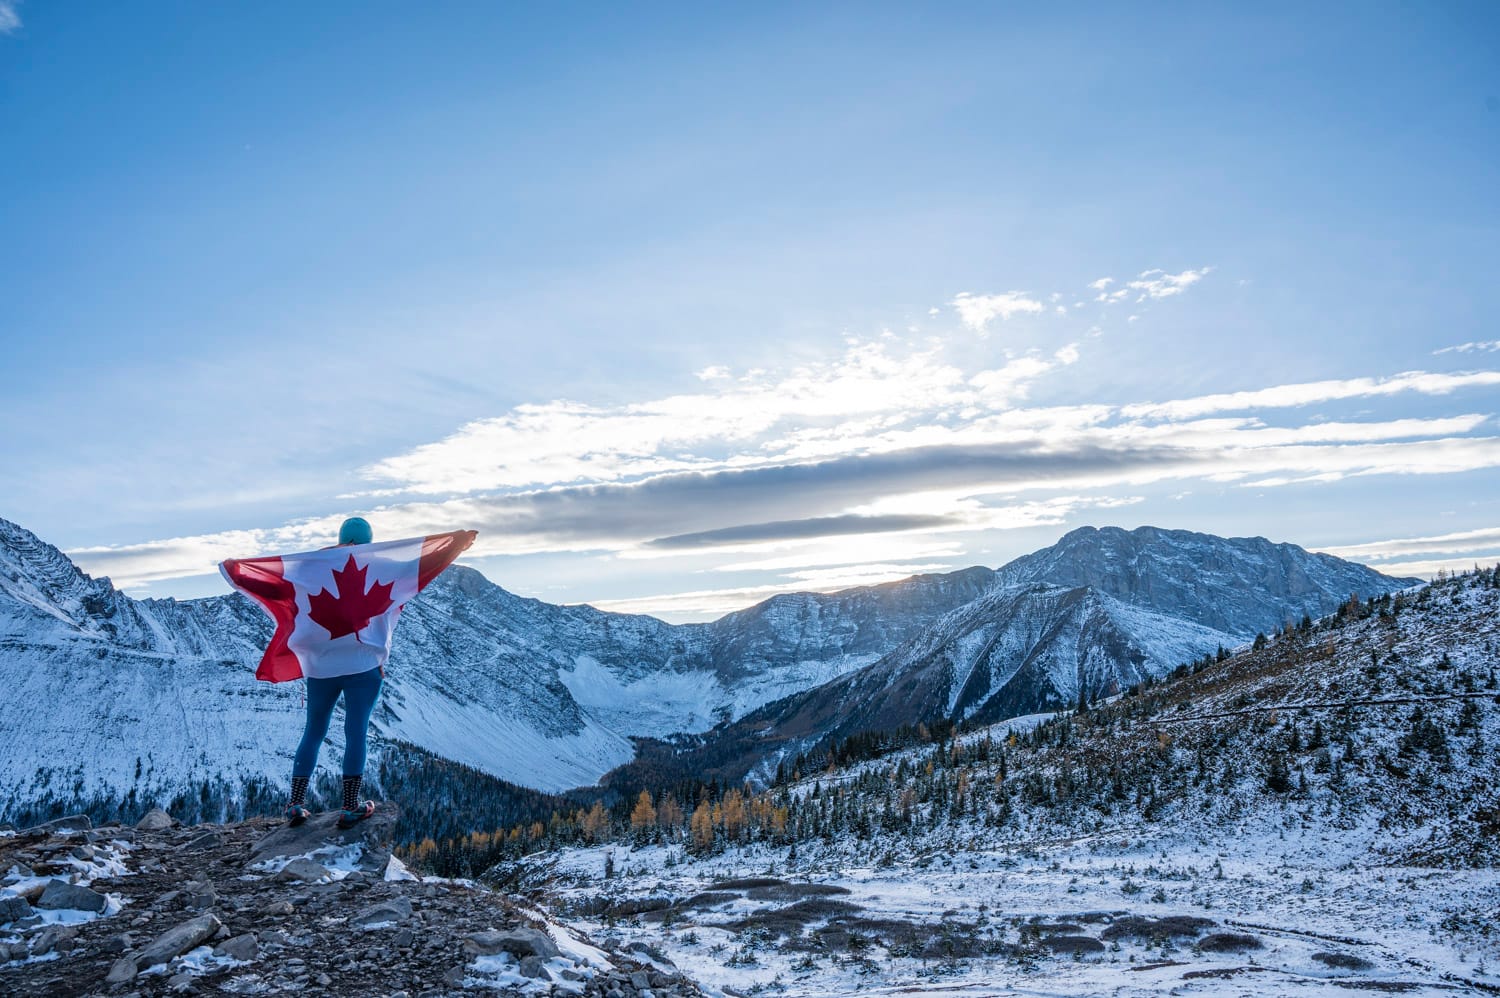
Has social media scrolling had you swooning over spending the larch season in Banff?
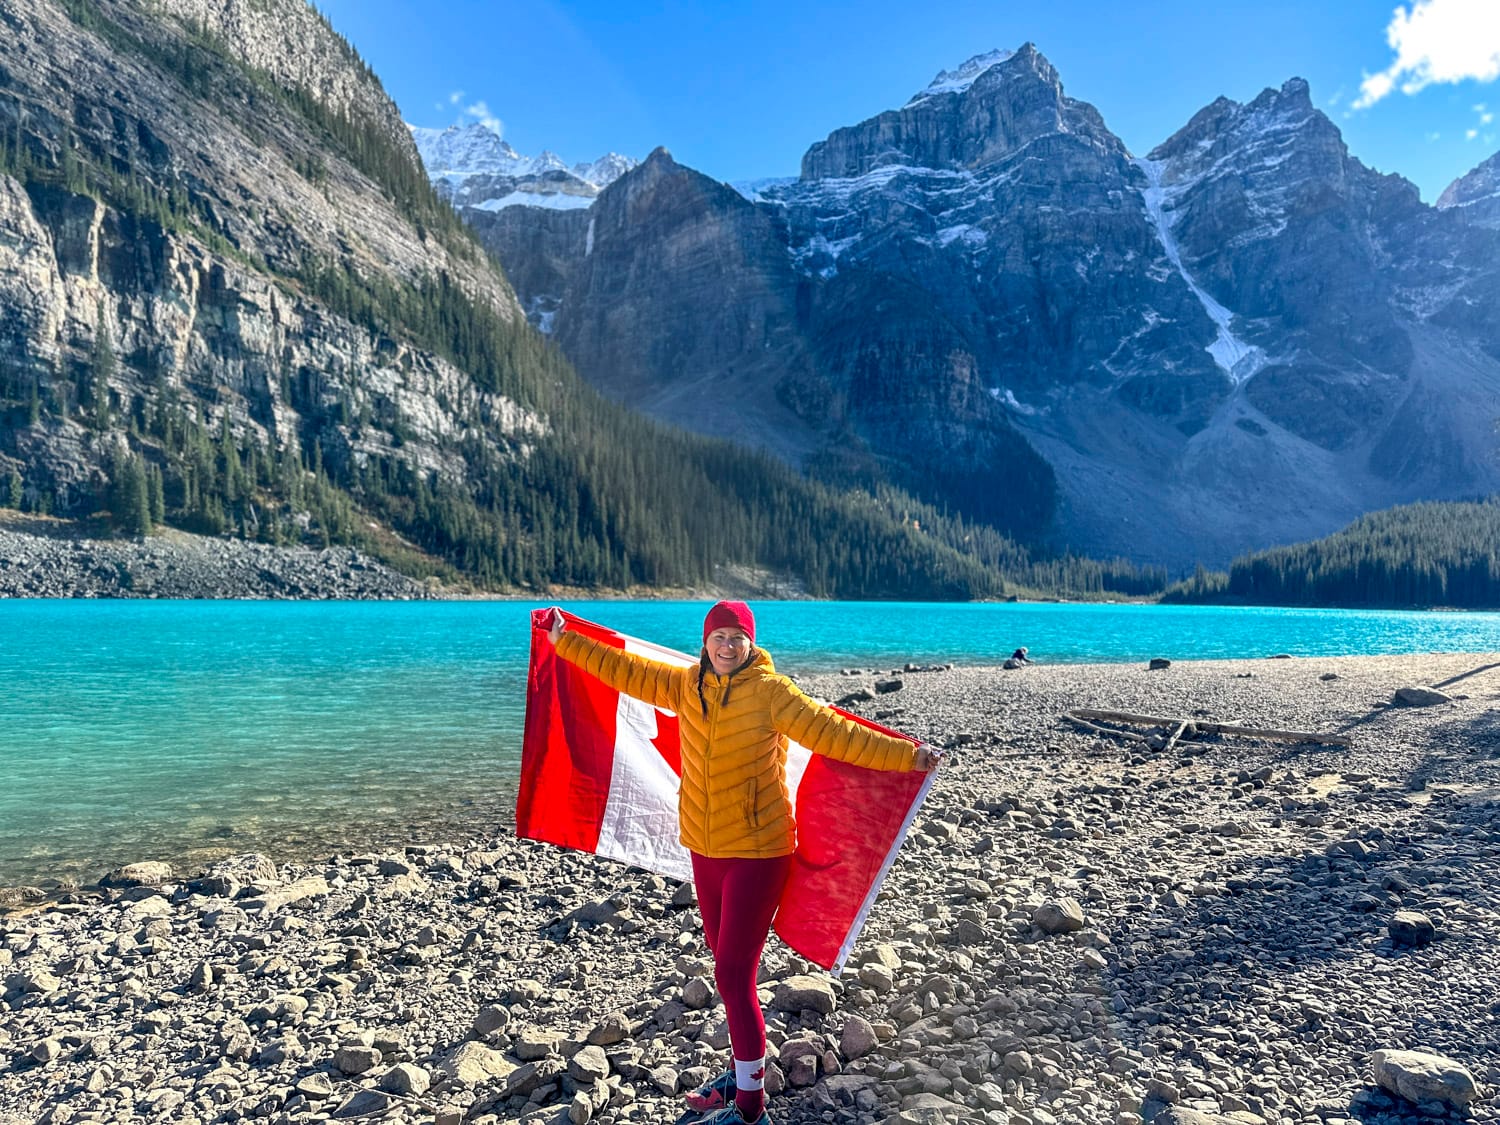
With picture-perfect landscapes 360 degrees around you, I can confidently recommend a Fall 2026 trip to Banff to see these golden larches. Last fall, we were tempted too, with the mouse hovering over the “book now” button online. But only a short WestJet flight from Abbotsford, and we were on the ground and in the larches in under 6 hours, squealing with excitement that we had made the best choice ever to seize #yolo and make the adventure happen.
I’ve put together this comprehensive guide to help you maximize your time and experience the Banff larch season in the beautiful Canadian Rockies.
What is the Larch Season in Banff?
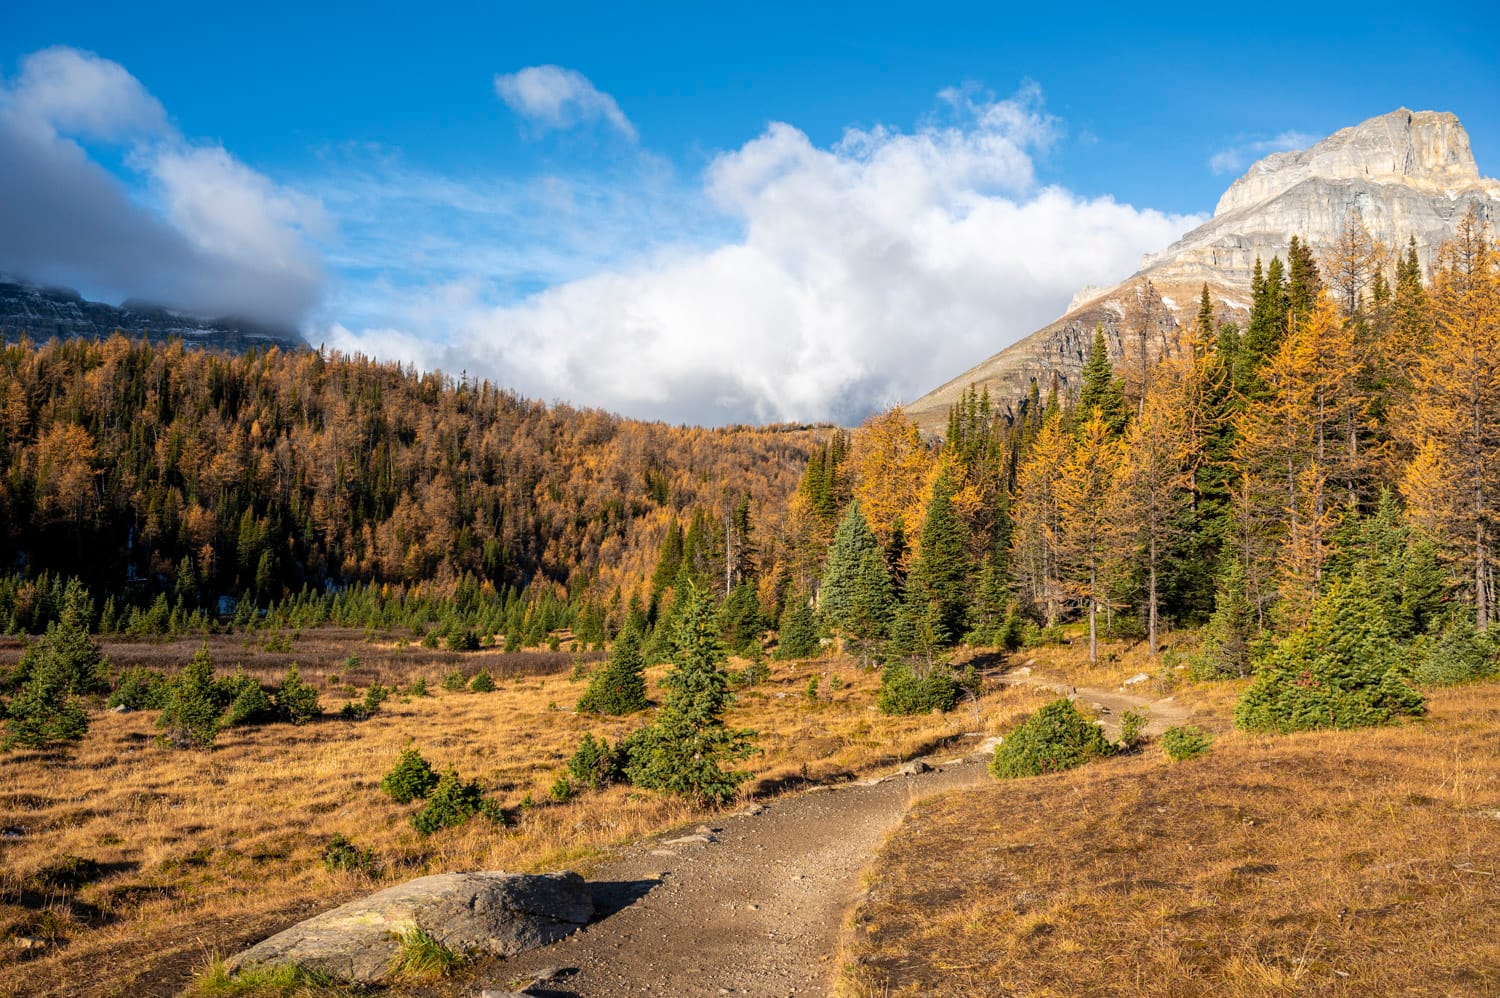
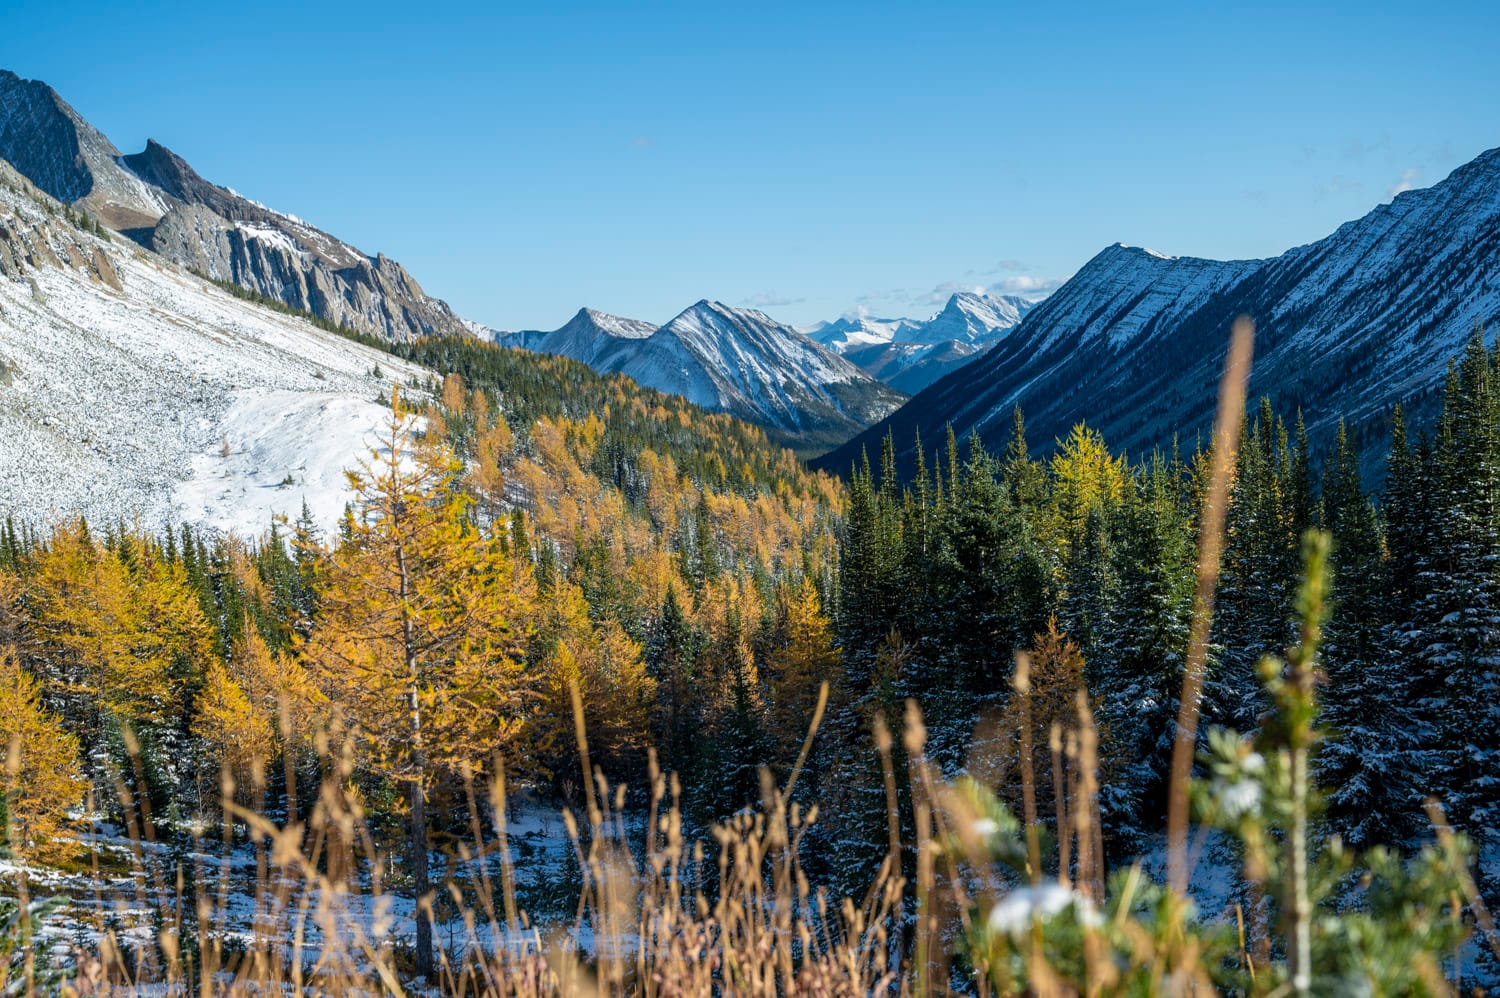
Banff larch season is a short window between the end of September and the beginning of October, when the beautiful conifer larch trees change from emerald green to a stunning golden yellow. What was typically referred to as “off season in Banff” or “Fall in Banff” is now called “Larch Season Banff” as these trees summon travellers from around the world who want to hike among and capture photography of the stunning tree transformations.
Larch Trees in Banff
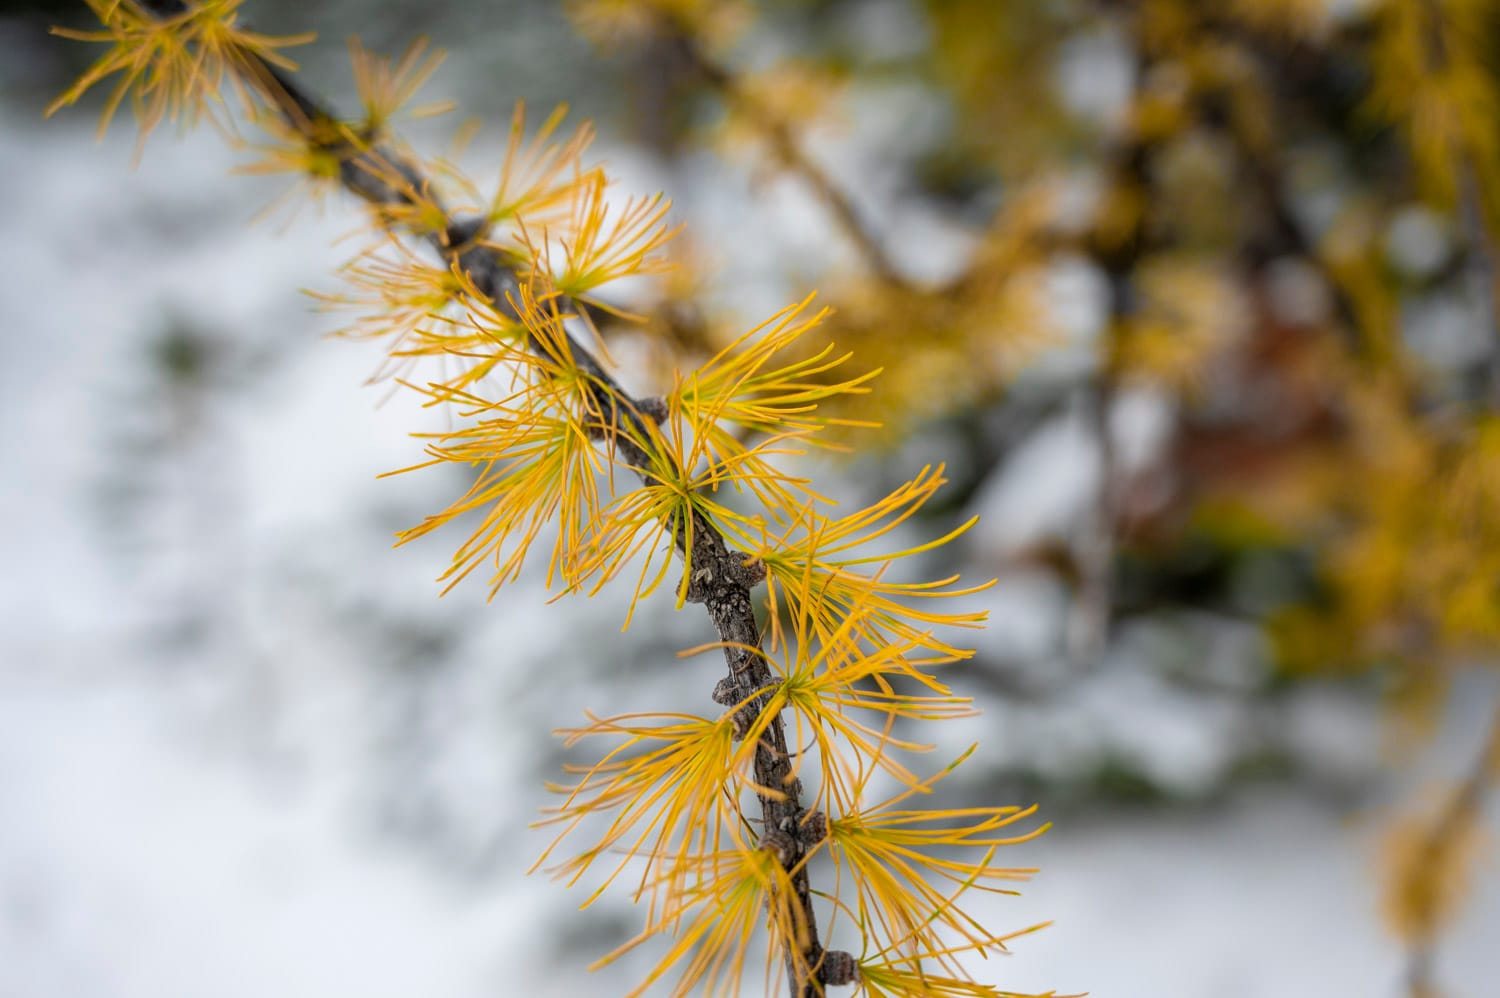
Unlike their deciduous cousins, larch trees in Banff are conifers that lose their needles each autumn, rather than being evergreen (didn’t think I’d be testing you on grade 4 science now, did you?). These trees go through a similar process to leaves, changing colours from green to yellow, and then the needles fall to the ground.
Larch trees live in subarctic alpine climates, making the Canadian Rockies one of the best places in the world to view the glowing larch trees. In BC, our favourite place to view them is in Manning Park at Mount Frosty.
Larches in Banff shouldn’t be judged by their size. They grow quite slowly compared to their peers, and a 6-foot tree can be up to 100 years old!
When To Experience The Best Larch Season Time In Banff?
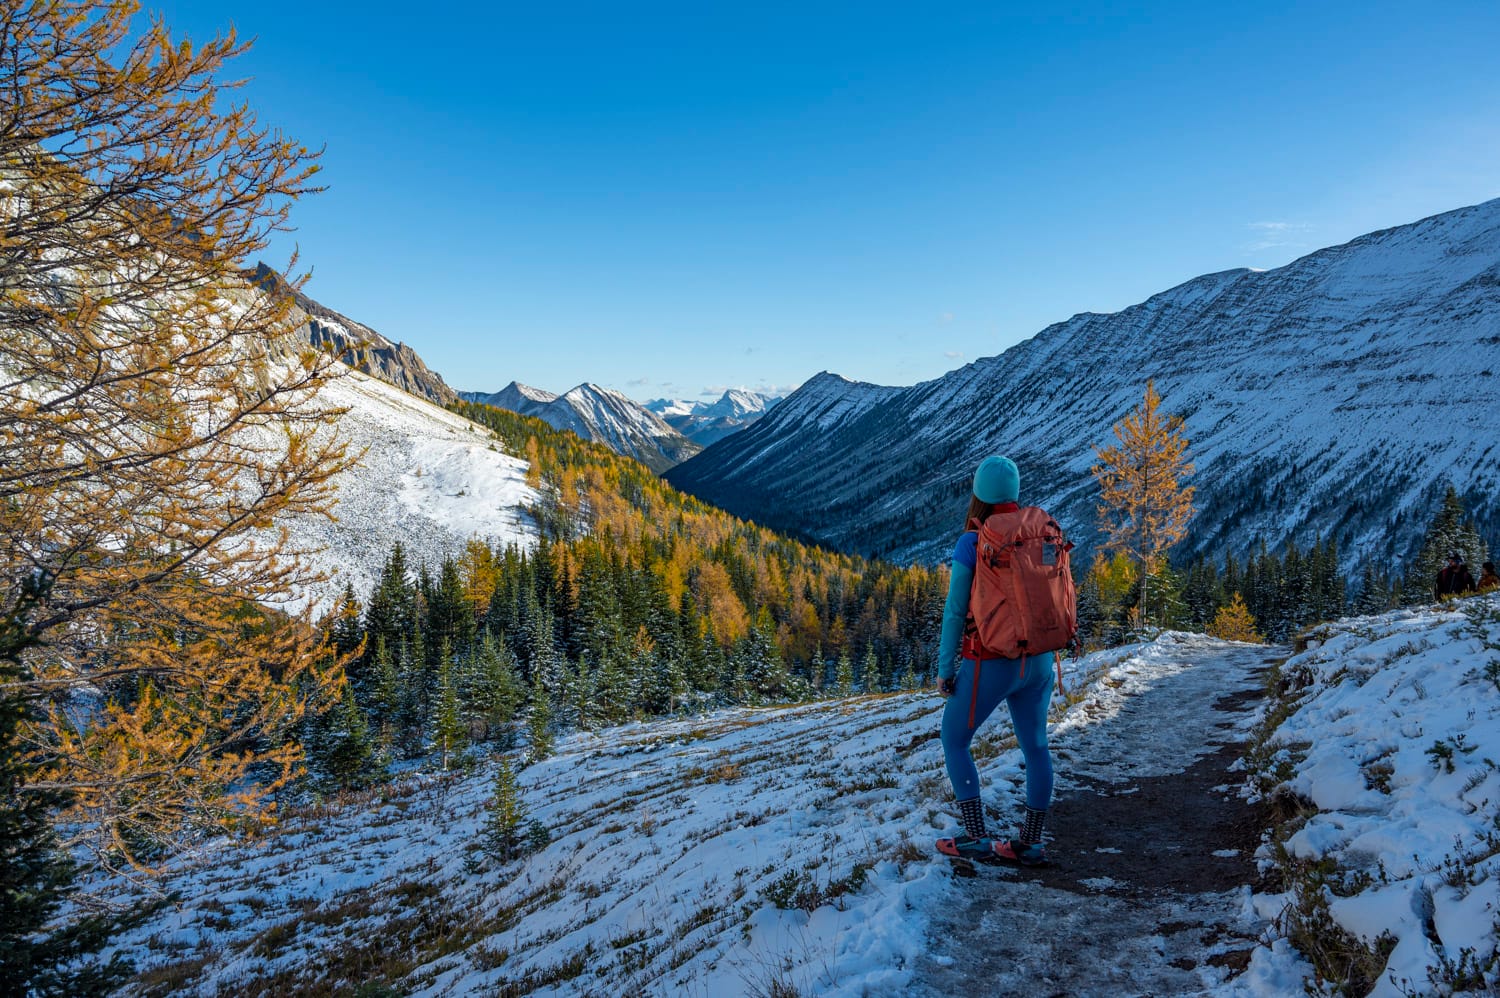
The best time for the larch season in Banff has been reported to be the last week of September (I reached out to local photographers to get their recommendations). We went the first week of October (October 5-8th to be exact) and when we arrived, there was a small skiff of snow on the ground… which we had not expected. We needed to buy crampons and hiking poles, and I’ll go into more detail later on in this article about all the things you need to be prepared. Also, by coming in at the end of the season, the larch tree needles were only at 50%.
Days after we left, a huge snowstorm rolled in, which closed down the road to Moraine Lake early and officially ended the larch season in Banff. All of the pictures in this article are from our early October 2025 trip, so as you can see, there’s still a LOT to experience, but if you want peak larch season in Alberta, head there at the end of September.
Traveller Tip: WestJet regularly has sales to Calgary during September, and now that you know the best dates, you can scoop up the flight deals and book your flight to see Banff in its golden glory!
Where To Go To See Larches In Banff & Kananaskis
The first place I recommend you stop and visit after you land in the Canadian Rockies is the Visitor Information Centre in Kananaskis or Banff. They will be able to guide you to trails that suit your timeline and mobility level, let you know about busy trails and any parking restrictions, as well as sell you bear spray if you don’t have any. This is also where you can purchase your passes to access both of these areas.
Banff National Park – Parks Canada Pass
To go exploring in Banff National Park, you’ll need a Parks Canada Pass (Discovery Pass). You can pick these up when you drive into the park or online in advance. The Discovery Pass is a physical pass you display in your vehicle, which is based on the number of people, and is valid for a year (from the date of purchase). The pass is required for anyone ages 17 and over. An individual adult (18-64) pass is $75.25, a senior (65+) pass is $64.50, and a family/group pass is $151.25 (good for up to 7 people in one vehicle).
For 2026, Canada is renewing their “Canada Strong” program, which gives everyone free access to National Parks and National Historic Sites for the Summer of 2026, but you’ll need to pay the entry fee if you’re visiting during September and October.
Kananaskis Conservation Pass
Vehicles parked at provincial parks and public land sites in Kananaskis Country and the Bow Valley Corridor require a Kananaskis Conservation Pass. These fees are set aside to support local conservation and safety efforts while improving services and facilities. You can either purchase your pass in person at the Kananaskis Visitor Centre or online (this pass is based on your license plate and isn’t a physical pass, so you may have to wait to purchase in person if you are renting a car and don’t know the license plate in advance). Passes are $15 per day and per vehicle.
Larch Trails in Banff National Park

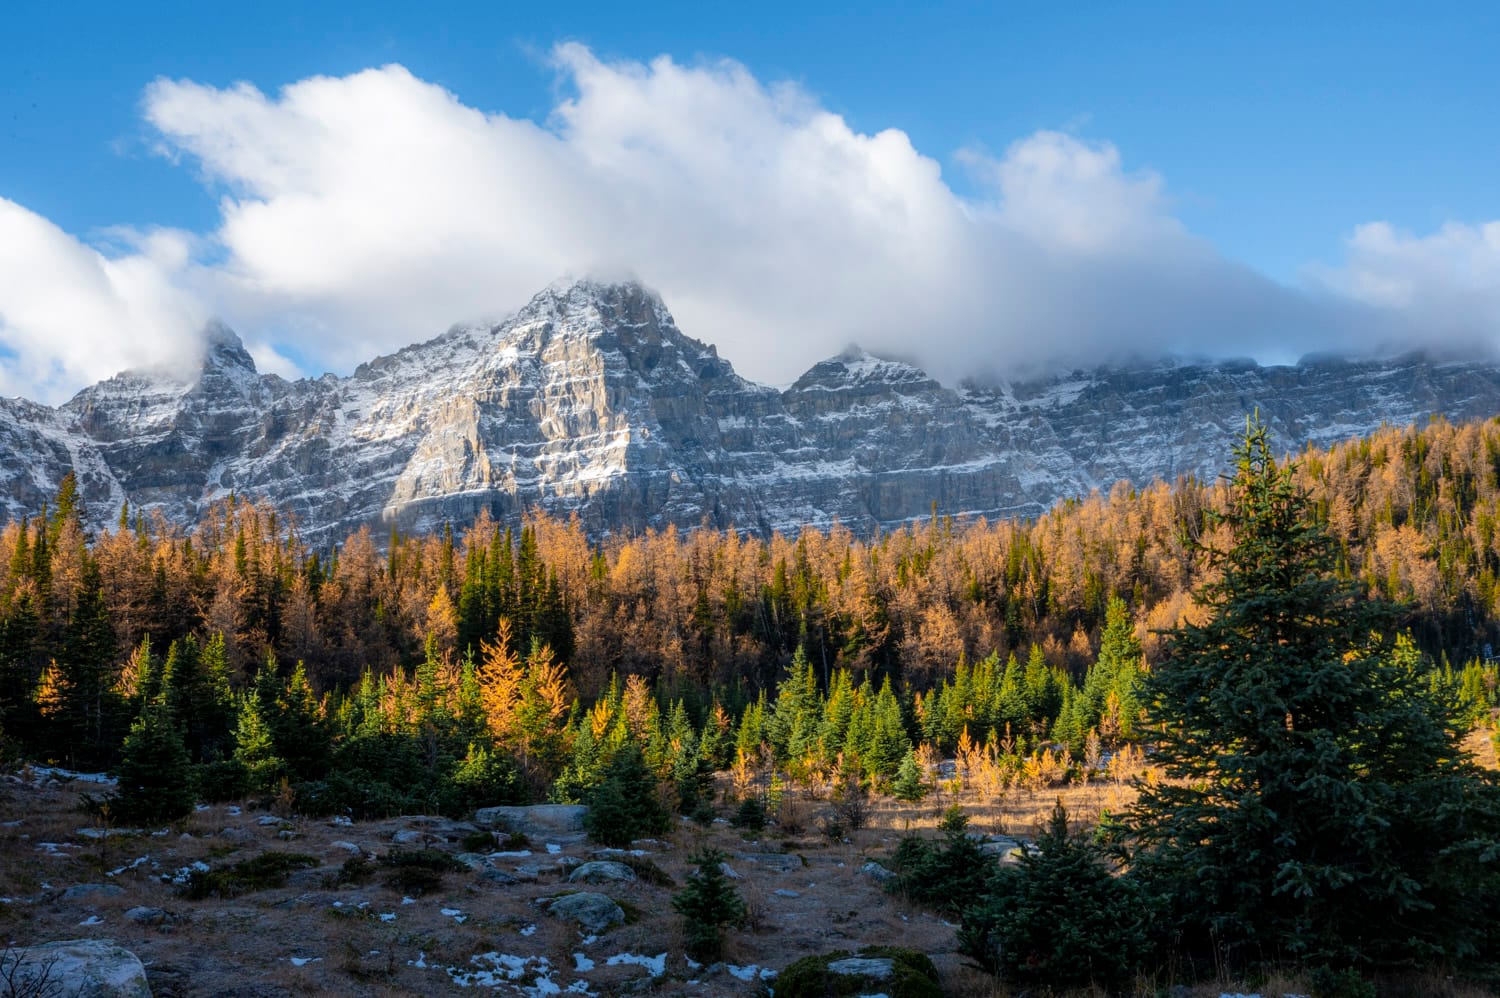
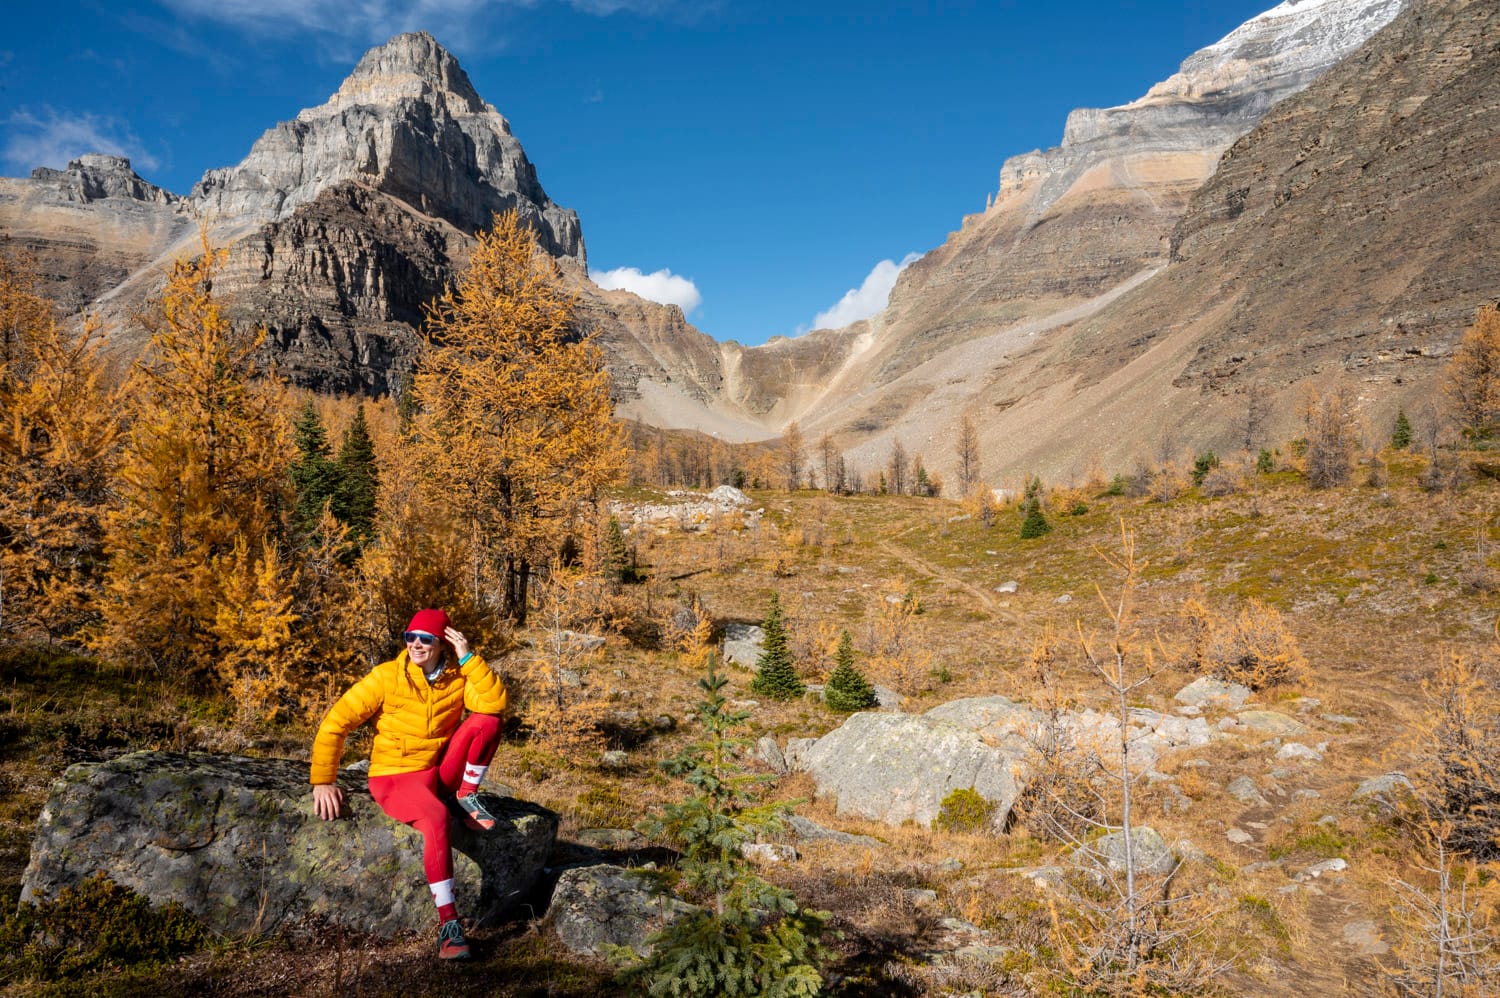
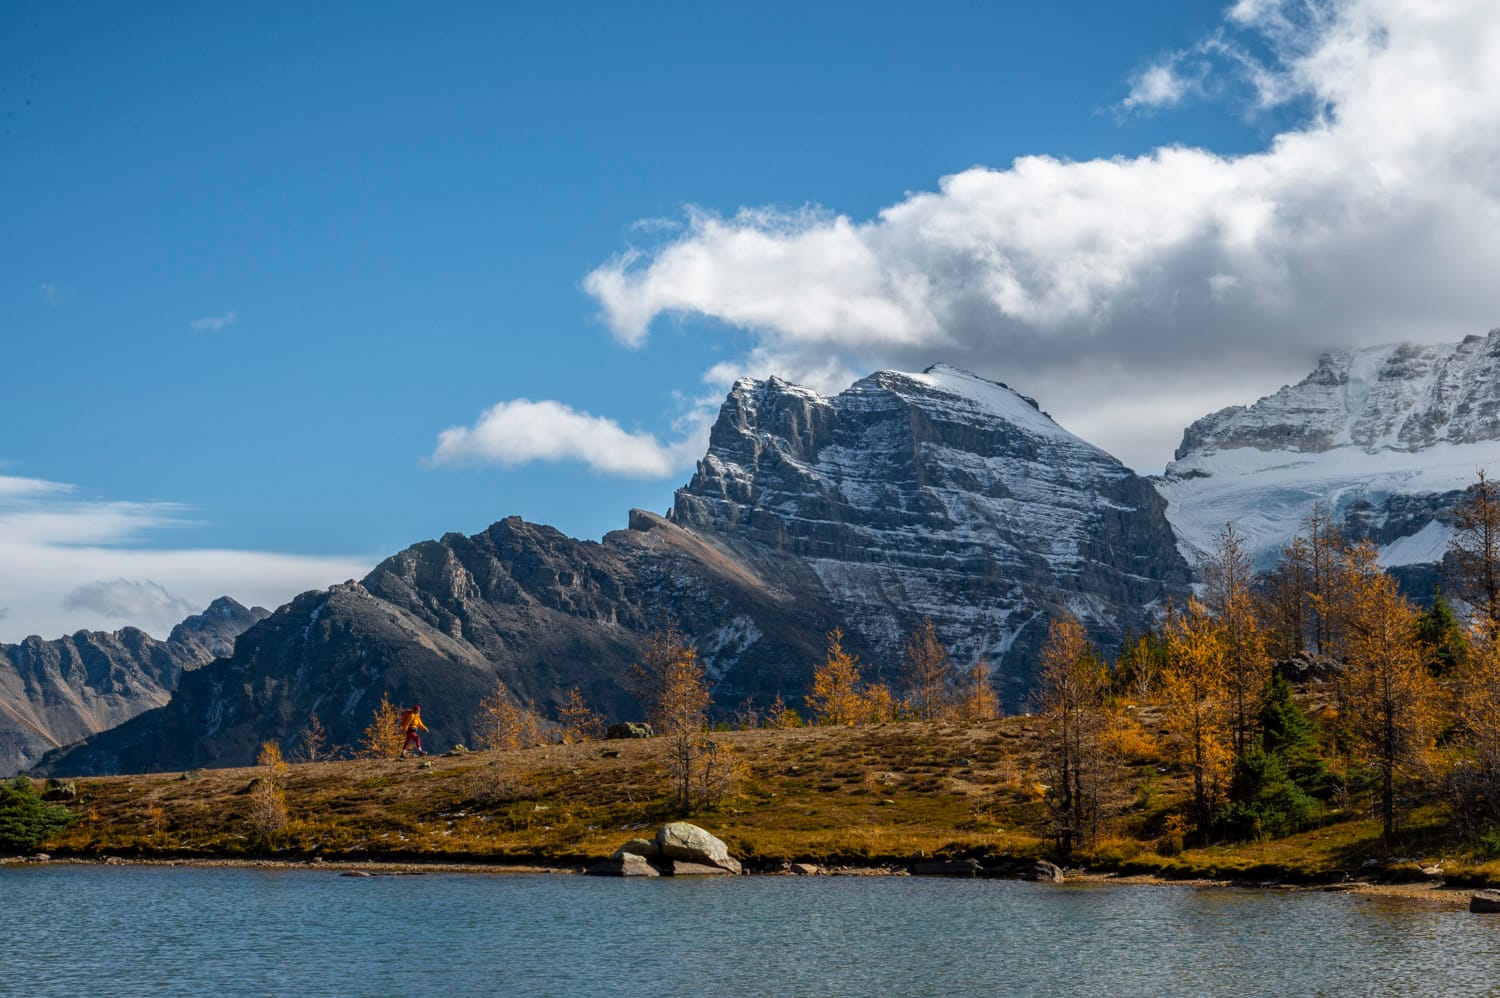
Larch Valley
Probably one of the most photographed larch trails in the world, the Larch Valley hike in Banff lives up to its worldwide fame. After a 2.3 km hike from Moraine Lake up a set of switchbacks with a moderate level of difficulty, you’ll arrive at the beginning of the Larch Valley Trail (and you’ll quickly forget about the hour or so of heavy breathing and hard work you just did to get up there!).
The flecks of gold started popping up like sparklers on a cake. My pace quickened as I rounded the corner, and I could start to see the beautiful larch trees in all their glory. I had dreamed, planned, and waited for this moment, but to see the bright yellow branches as they reached up to the indigo blue sky exceeded every expectation I had. And while the trees were truly magnificent, I wasn’t expecting the backdrop of the towering mountains to provide as much awe, leaving me with only squeals to process my excitement and the challenge of going back and forth between my camera and video recording, attempting to capture it all.
Technical Trail Information: Larch Valley Trail
- Total Trail Length: 8.9 kilometres (out and back trail)
- Trail Elevation: 564 Meters
- The trail starts flat alongside Moraine Lake and quickly goes up switchbacks and considered a challenging route on All Trails. It takes the average hiker 3.5 hours to complete (it took us WAY longer as we also added on Sentinel Pass [see below] as well as hung out in the larches to take hundreds of photos).
- As you’re hiking up the switchbacks, be sure to stop and look out at the peek a boo views over Moraine Lake.
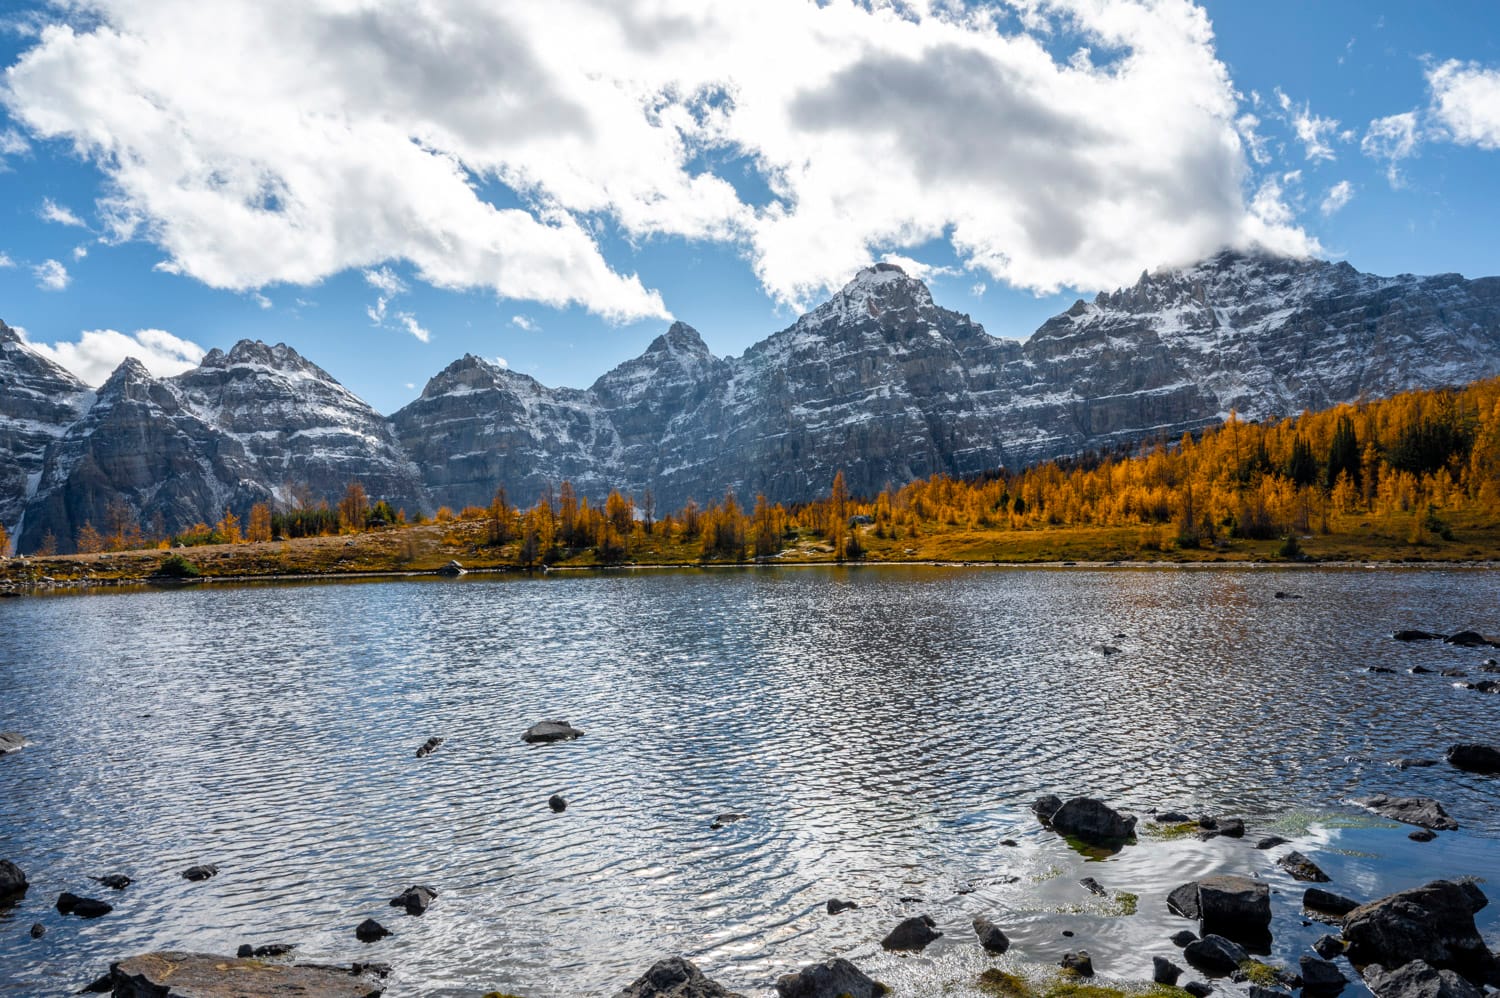
- The Larch Valley Trail takes you through the Valley of the Ten Peaks lined up behind it, winds in between the larches, and then opens up to a wide panoramic view looking down on the valley of larch trees and mountainscape. Don’t (I repeat, don’t) only go to the first lookouts… It’s totally worth going all the way to the top so that you can see the most amazing views!
- Minnestimma Lakes – This is a great place to stop for a meal, layer up (it can get quite windy) and take panoramic photos of the larch trees set on the backdrop of the mountains.
Photographers / Local Tip: One of the best pieces of advice we received came right after stepping off our 7 AM shuttle. Our driver — a professional photographer (check out his IG here!) — suggested we skip sunrise at Moraine Lake. Why? Because the sun doesn’t hit the peaks around the lake until about 10:30 AM, meaning those iconic shots wouldn’t have the golden glow we were hoping for. Instead, he recommended we head straight up to Larch Valley. We’re so glad we listened. For most of the morning, we had the trail entirely to ourselves — no crowds, no one stepping into our photos. It felt like our own private viewing of the larches in peak colour. Peaceful, golden, and completely unforgettable.
Sentinel Pass
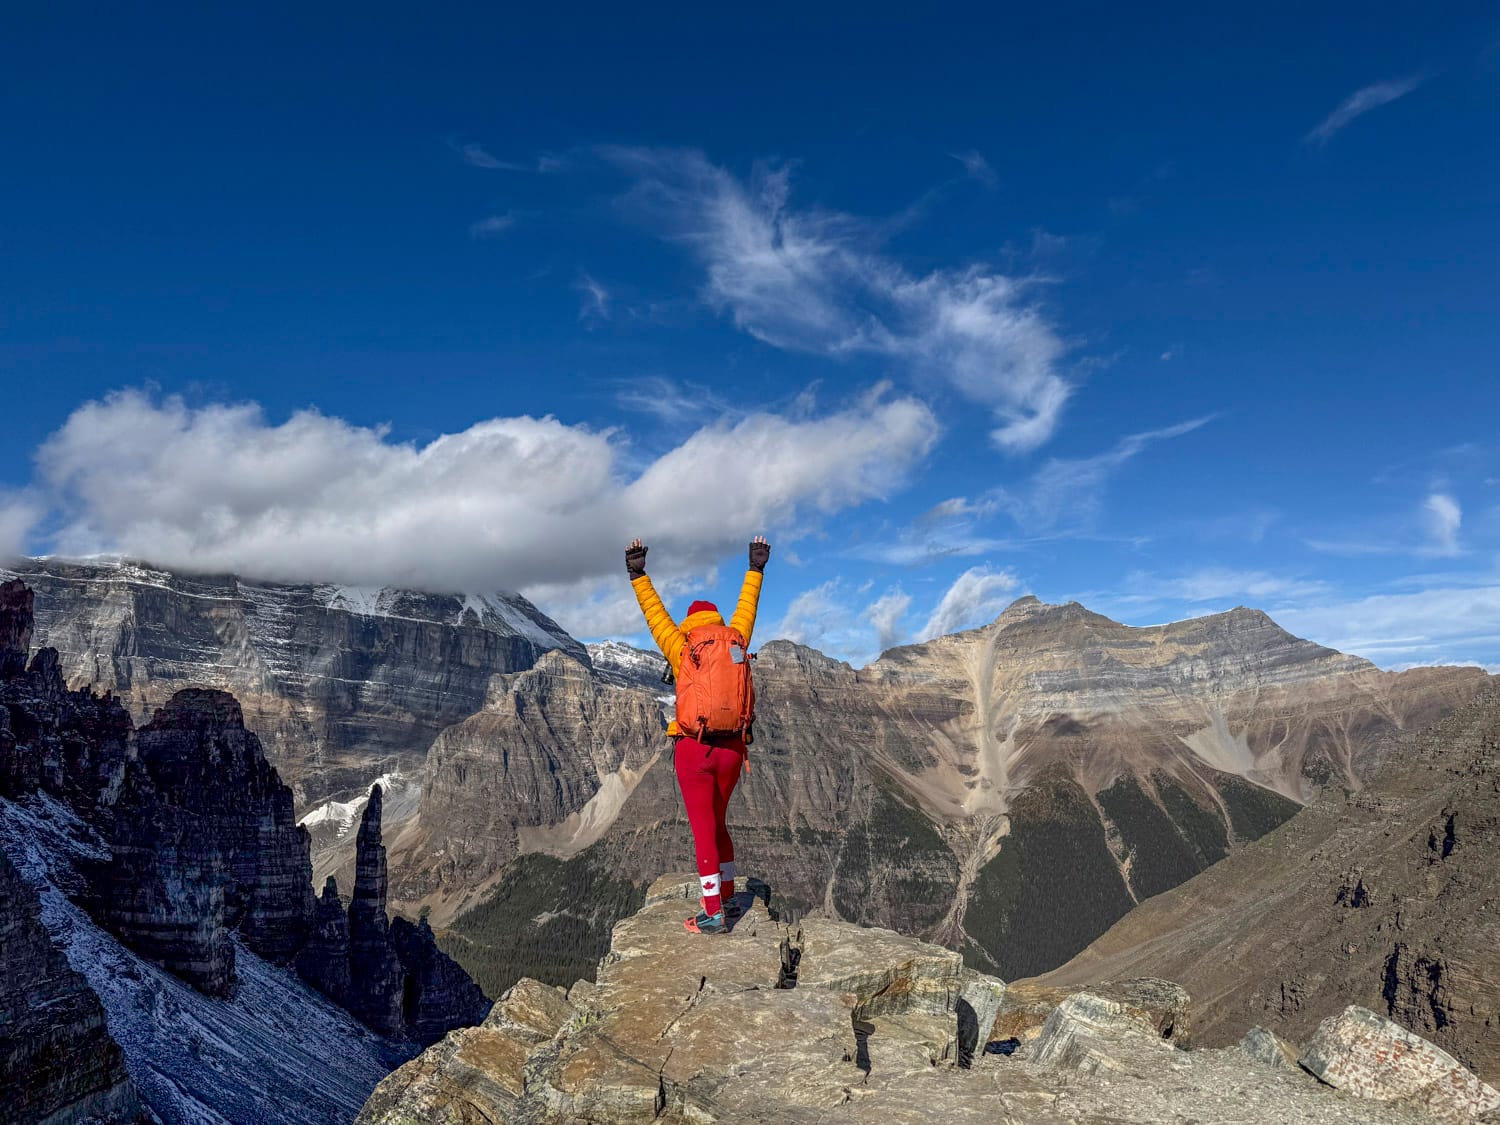
When you’re at the top of the Larch Valley hike, it’s hard to imagine that the views could get any better. And I’ll be totally honest, as you look up the cliffside at the switchback trails leading to Sentinel Pass, you may think, “Is it really worth it?” The answer is 100% YES! With “only” 1.5 km to go to the pass, if you have the energy, the physical capacity, I challenge you to push through; you won’t have any regrets!

Once you’re at the top of the pass you’ll look out over on the other side for a 180 degree view of the Paradise Valley mountain range. This means you’ll be perfectly poised between two mountain ranges, each offering a completely different view.
This is a great place to stop for a snack, a drink, and then make the difficult decision of where to look out to first. The views all around are truly incredible and take all the time you can to enjoy your time in the mountain paradise (we were up there for about 40 minutes as I took so many photos). You’ll want to layer up, have a toque, gloves, and find a sheltered spot to stay warm (as it was very windy when we got to the top).
Technical Trail Information: Sentinel Pass
- Total Trail Length: 11.1 kilometres (out and back trail from Moraine Lake). If you are adding this to the Larch Valley Trail (which is how you access it), it is only an extra 3km (1.5 there and back) from Larch Valley.
- Trail Elevation: 564 Meters from Moraine Lake or 234 meters above Larch Valley Trail
- The trail is 1.5 km up switchbacks from Larch Valley and considered a hard route on All Trails; it takes the average hiker an hour to complete (not including viewing time).
- Be sure to stop to take breaks and soak in the epic view behind you!
Happy Hikers On The Trail
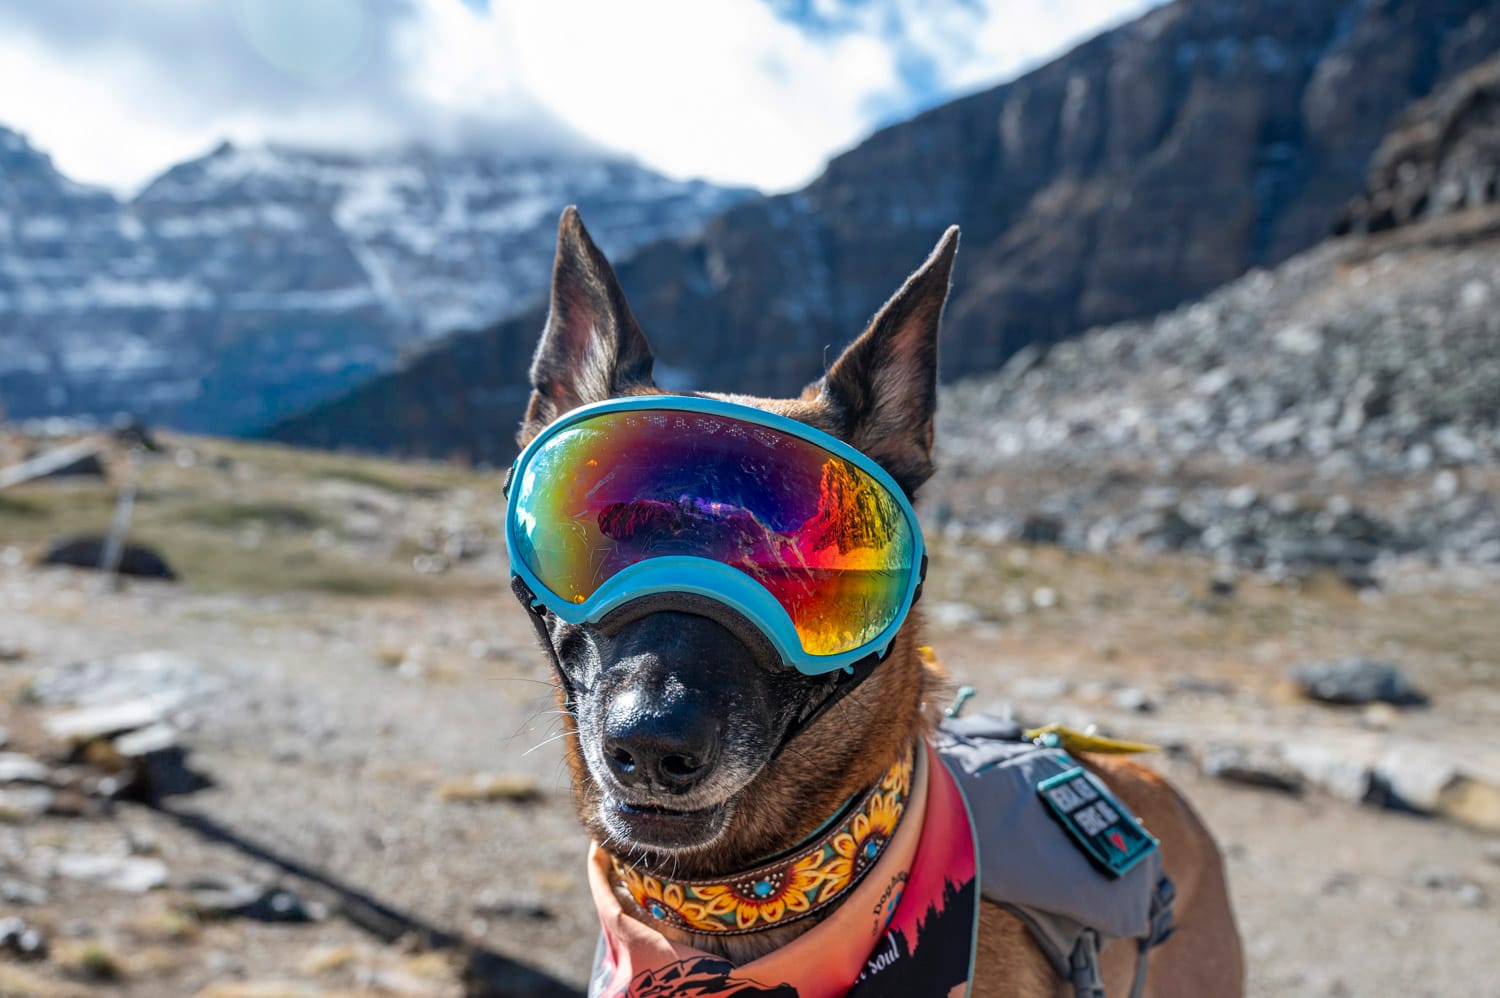
You meet a lot of people hiking, but this was undoubtedly one of my favourite interactions during our fall hiking season. A seasoned companion, this little adventure seeker was both a service animal and a hiking mascot! Happy to pose for pictures and accept pets, this well-styled K9 brought a lot of joy to hikers on the trail.
Trail Facts To Help You Prepare To Hike Larch Valley & Sentinel Pass Via Moraine Lake
Shuttle Required
The trails are only accessible from Moraine Lake, and you need a shuttle to get to Moraine Lake as the road is closed to the public. You can try for the Parks Canada reservation system, but try to book WAY in advance. The initial Parks Canada shuttle reservations launch is mid-April, with a few additional seats made available to reserve two days prior to each departure day. If you leave it to the last minute, you’ll probably join 25-30 thousand people in line for a few additional last-minute tickets. If you can’t get advanced reservations, I recommend you book in advance with one of the local shuttles. We booked last-minute with Moraine Lake Bus Company and paid the premium price of $110 per person. They do offer dynamic pricing, so the earlier you book your trip, the cheaper it should be.
🌄 Want those iconic turquoise lake photos without the chaos? Grab your Moraine Lake Bus ticket now and arrive relaxed, on time, and ready to explore.
When To Go
We booked the first shuttle of the day (6:40 am) and the last shuttle out (5:00 pm) so that we could spend the whole day hiking in the larches, up Sentinel Pass, and then down to Moraine Lake for afternoon snacks. We thought it might be too long a day, but it was perfect. We loved being able to take our time and not having to rush back to a shuttle.
No Bathrooms Available On The Trail
There are pit toilets in the parking lot of Moraine Lake, and they can get quite lined up, so plan out your bathroom breaks accordingly. If you need to use Mother Nature as a restroom, be sure to bury your waste at least 6 inches deep & 200 meters away from water sources and trails, always pack out used toilet paper (bring an extra Ziplock bag) and use hand sanitizer when you are finished.
Want to be prepared to go to the bathroom the Leave No Trace way? Consider making yourself a kit that includes a lightweight hiking trowel, toilet paper (or better yet, a reusable pee cloth), an extra Ziplock bag, and hand sanitizer.
Larch Season In Kananaskis – Where To Go Hiking To See The Larch Trees

Larch Season Kananaskis
While we had originally planned on only going to Banff to chase the larches, we discovered that not only was Kananaskis on the way, but they boasted some of the best larch hikes in the region! So we pivoted our schedule to allow us to head right to Kananaskis for the night after we landed and get in 2 hikes that afternoon, as well as a great morning hike the next day!
Where is Kananaskis?
If you’re like me and have never been to Kananaskis, you’re missing out! I have travelled through Banff more times than I can count, but had never been to Kananaskis. Located 30 minutes southeast of Banff, this quieter region is SO BEAUTIFUL I can barely find the words to describe it (I know, what a challenge as a writer, thank goodness I can rely on my photography skills to show you why you should go).
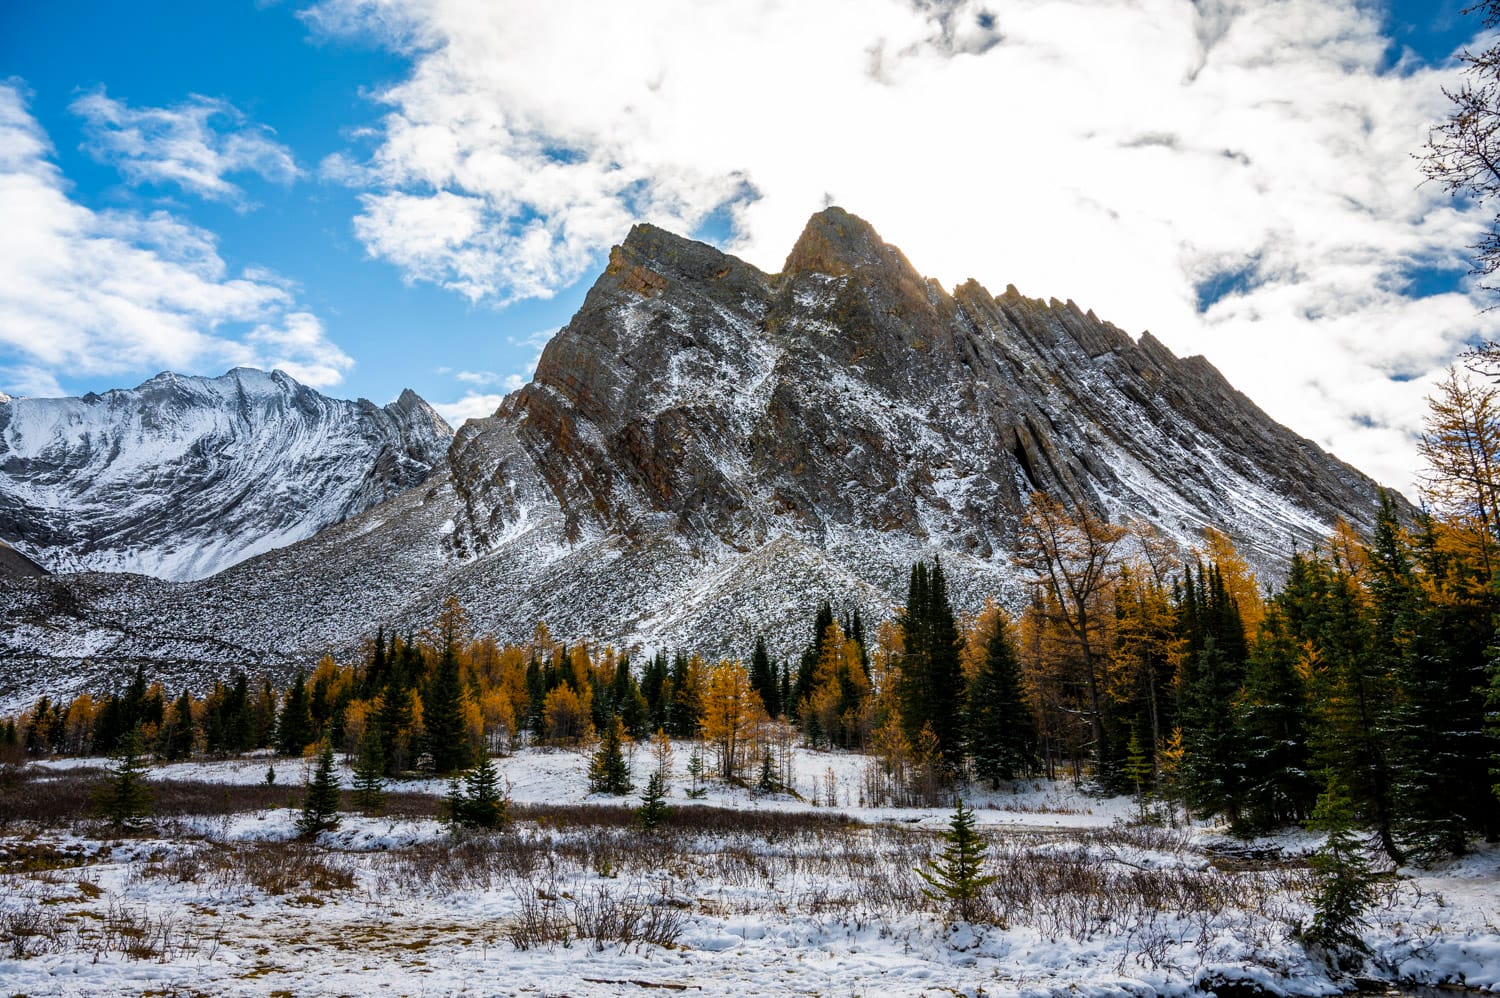
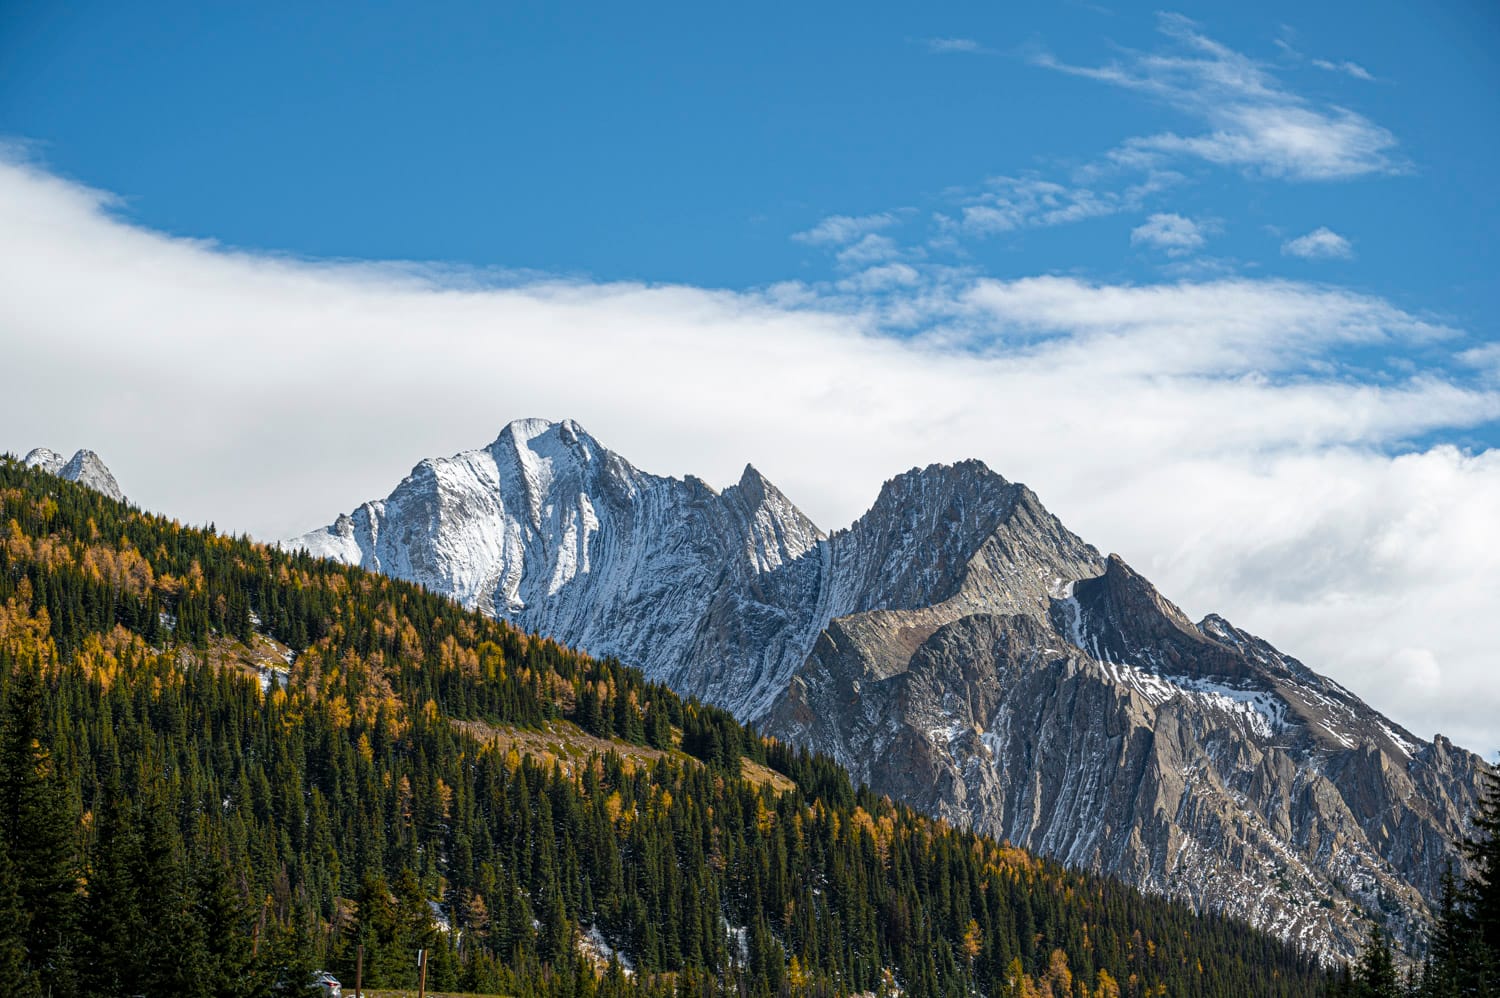
Ptarmigan Cirque
Our first stop after we touched down in Calgary was to pick up our Mitsubishi Outlander and head straight for our first sight of the larches at Ptarmigan Cirque. While we had expected a fall hike, we were surprised to see that winter had arrived early, with Mother Nature dashing a light layer of snow on the trail. This made it muddy, slippery and more technical to navigate, so learn from us and bring campons just in case you need them (even if snow isn’t in the forecast).
Once we got through the technical pieces of the hike, we were up in the beautiful valley that was the cirque. Cirques are an amphitheatre-like valley, almost like a bowl, that were created when a glacier carved and eroded the mountains. We almost felt dizzy looking up into the cirque as the mountains pulled over our heads at an angle that was disorienting in all the right ways! Mix that view in with a valley of larches and evergreen trees, and we were caught in an afternoon delight of visual perfection.
Technical Trail Information: Ptarmigan Cirque Hike
- Total Trail Length 3.4 kilometres and is considered a challenging route due to its technical maneuvering that needs to be done on the single track trail.
- It takes the average person 1.5 hours to complete (we took a bit longer on the trail because every turn seemed to offer another photo-worthy view we couldn’t pass up!).
- Trail Elevation: 263 meters (you’ll do most of the hard work up the trails, and once you’re at the cirque, it levels out as you meander around the cirque).
- There are a plethora of views to be enjoyed, so be sure to look around you and behind you, not just in front of you.
Wedge Pond
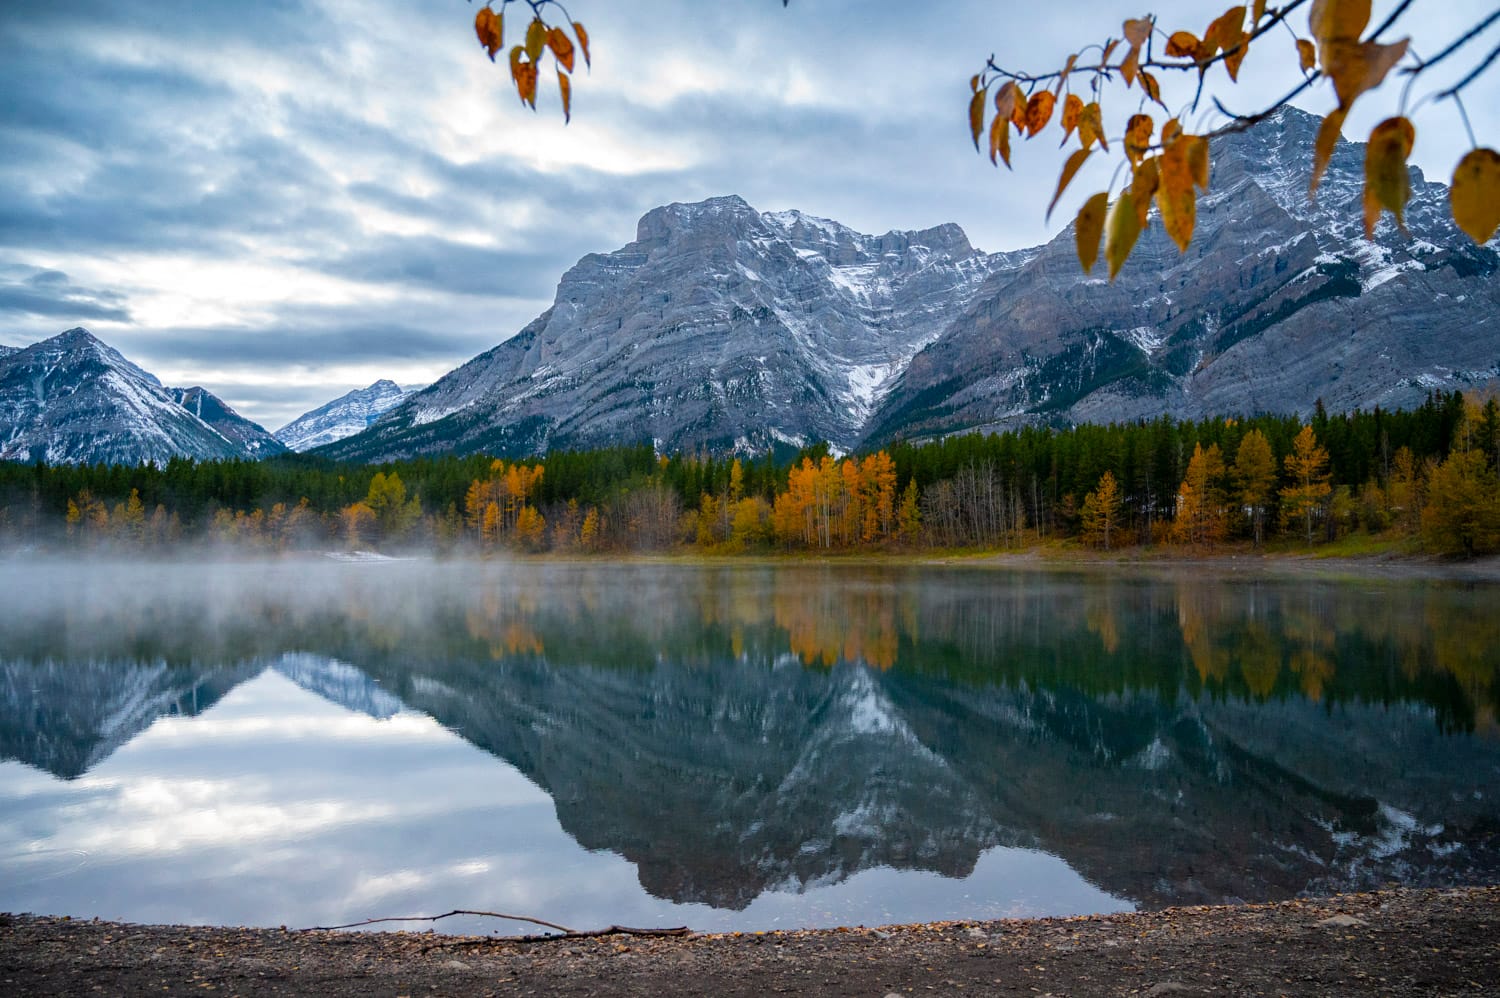
As sunset fell and the day started to transition into night, we decided to make one stop before dinner at Wedge Pond. A short 1.0 km loop, accessible down a short trail from the parking lot, we wanted to see if this scenic spot was as picture-perfect as we had seen online.
As we wandered down the trail, trying to beat the sun as it set, a mist of fog rolled up onto the lake. Mixed with a beautiful reflection of the mountains and surrounded like a picture frame in colours of gold and yellows, this was a spot that we were so glad we stopped at. From running along the shore to take photos, to peeking behind leaves trying to get unique angles, Wedge Pond is the literal definition of what it means to be “picture perfect.”
Full Disclosure: There are no larches at Wedge Pond… only fall foliage on full display.
Arethusa Cirque

The next morning, we woke up early, the larches were waiting, the sun was shining, and we didn’t want to miss a minute of mountain magic! So we decided to head back down towards Ptarmigan Cirque and hike among the larch trees we had spotted in the valley below us.
Another technical start to our day, as crampons and hiking poles were needed, we made it into Arethusa Cirque, anticipating a beautiful view. The way that these earth-toned mountains surrounded us like a warm hug, officially embracing our quest for larch trees, was incredible. After peeking through the trees that led to a beautiful stream, we ran into the valley to take 360 views. We were grateful for the early start, as later on, when we circled back, there were a lot of people, and the early start made us feel like we had the place to ourselves.
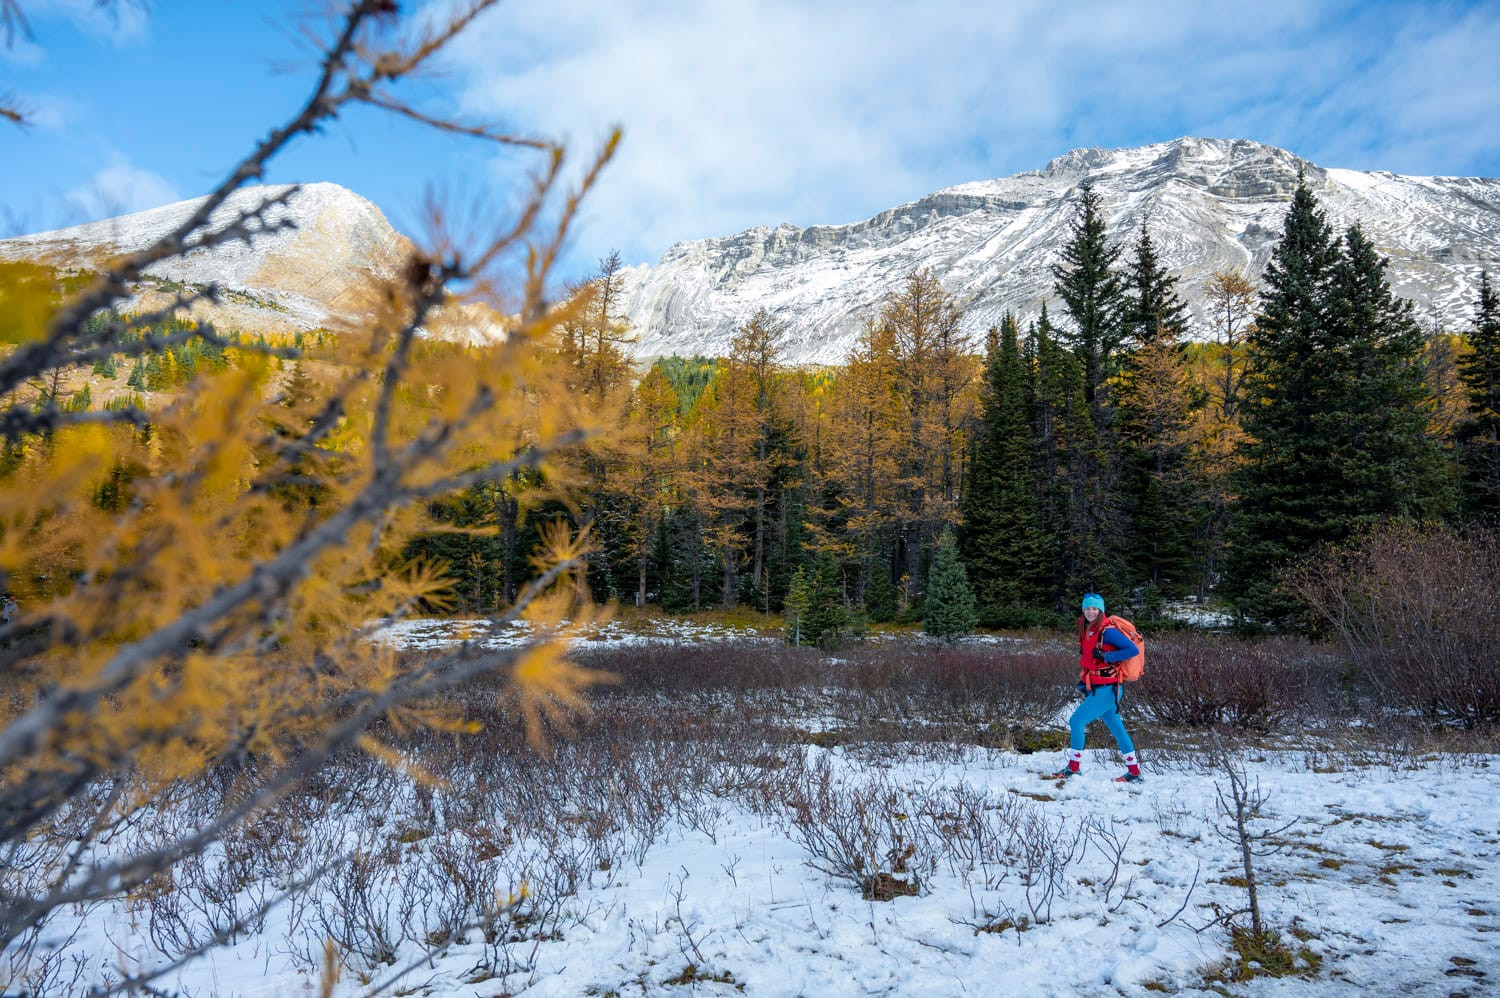
Arethusa Cirque is not an official trail, but is one of the best places to see the larch trees in Kananaskis, and you can find it on All Trails. I recommend that you download the maps before you go, as there are quite a few different routes you can take, and recent advice from hikers on the best way to go. You can go clockwise, counterclockwise, or through the middle.
Technical Trail Information: Arethusa Cirque
- Total Trail Length: 4.5 kilometres and is considered a moderately challenging route due to its technical maneuvering that needs to be done on the single track trail.
- There’s no average time it takes to complete this trail, as there are so many different routes.
- I’ll say it again, download this map before you go, as there’s no signal once you arrive, and no trail signs to direct you, leaving you wandering if you can’t navigate properly.
- Trail Elevation: 377 meters, and it is a loop trail.
Trail Facts To Help You Prepare To Hike Ptarmigan Cirque, Arethusa Cirque, and Visit Wedge Pond
- A Conservation Pass is required, and you can pick that up online or at the local Visitor’s Information Centre. We opted to pick ours up in person for 3 reasons. First, we love stopping at visitor centres where we are visiting to get first-hand information from the locals. Second, the conservation pass is based on your vehicle’s license plate, so if you are renting a car, you won’t know that in advance. Third, we wanted to purchase bear spray to have with us for all of the hikes on our trip (as you’re not allowed to bring it on your WestJet flight).
- There is no service in these areas, so be sure to download your trails before you go hiking.
- Do you need bear spray? I hope not, but I wouldn’t be hiking in bear country without it! (so yes, I’m being cheeky because you need it). Make sure it’s easily accessible (not buried in the bottom of your hiking pack).
All Trails Tips & Navigation For Hiking During Larch Season
If you’ve never used the All Trails app, here’s an unsolicited recommendation from a regular hiker – Get the app! I love that I can download trails (so they are available when you are offline/don’t have cell reception) and be able to track my progress, but most importantly, I can get real-time updates from recent hikers with trail conditions, parking challenges, and recent photos that help.
Just be sure to download the trails before you head out and still have wifi/cell reception, or you’ll make the mistake like this seasoned veteran did and end up at a trail without a map! (I swear I had downloaded it!).
Transportation Recommendations: How To Get Around
WestJet
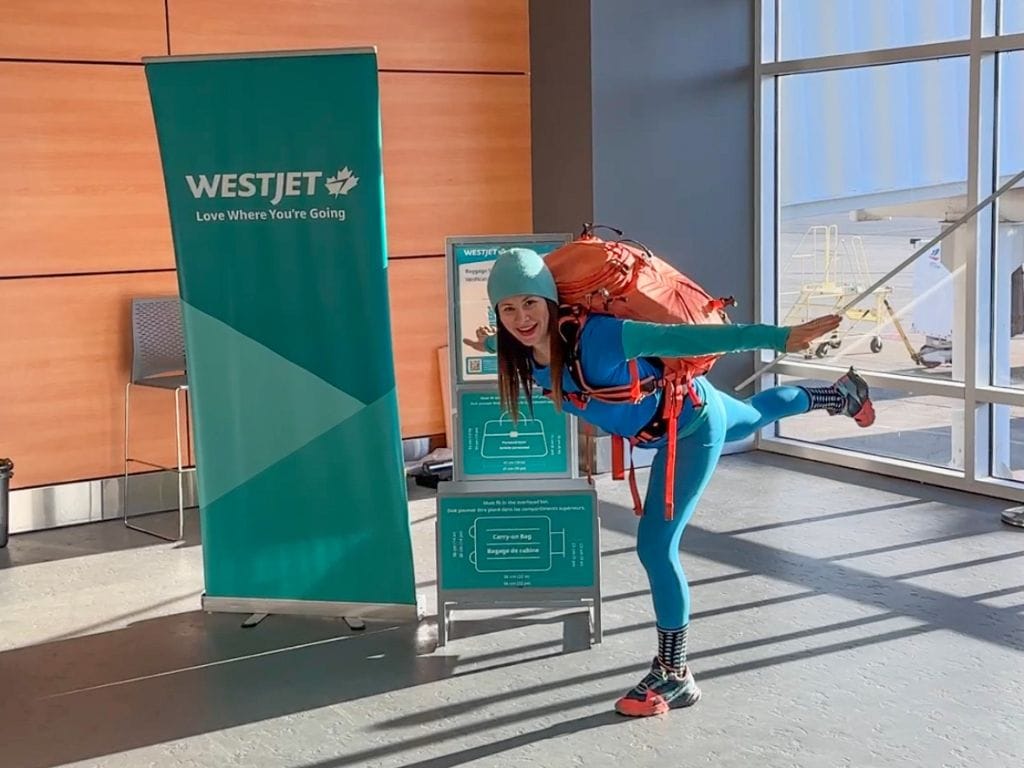
Flying WestJet from Vancouver—or even better, Abbotsford—to Calgary is the best choice for anyone looking to save time, money, and hassle. The flight takes just over an hour, making it far quicker and more convenient than driving the nearly 10-hour route through the mountains, which means more time for adventures in Banff! Departing from Abbotsford Airport is especially advantageous, as it’s smaller, less crowded, and often offers lower fares and cheaper parking compared to Vancouver International Airport. You can breeze through security, board quickly, and arrive in Calgary relaxed and ready to go. We love flying with WestJet from Abbotsford to Calgary.
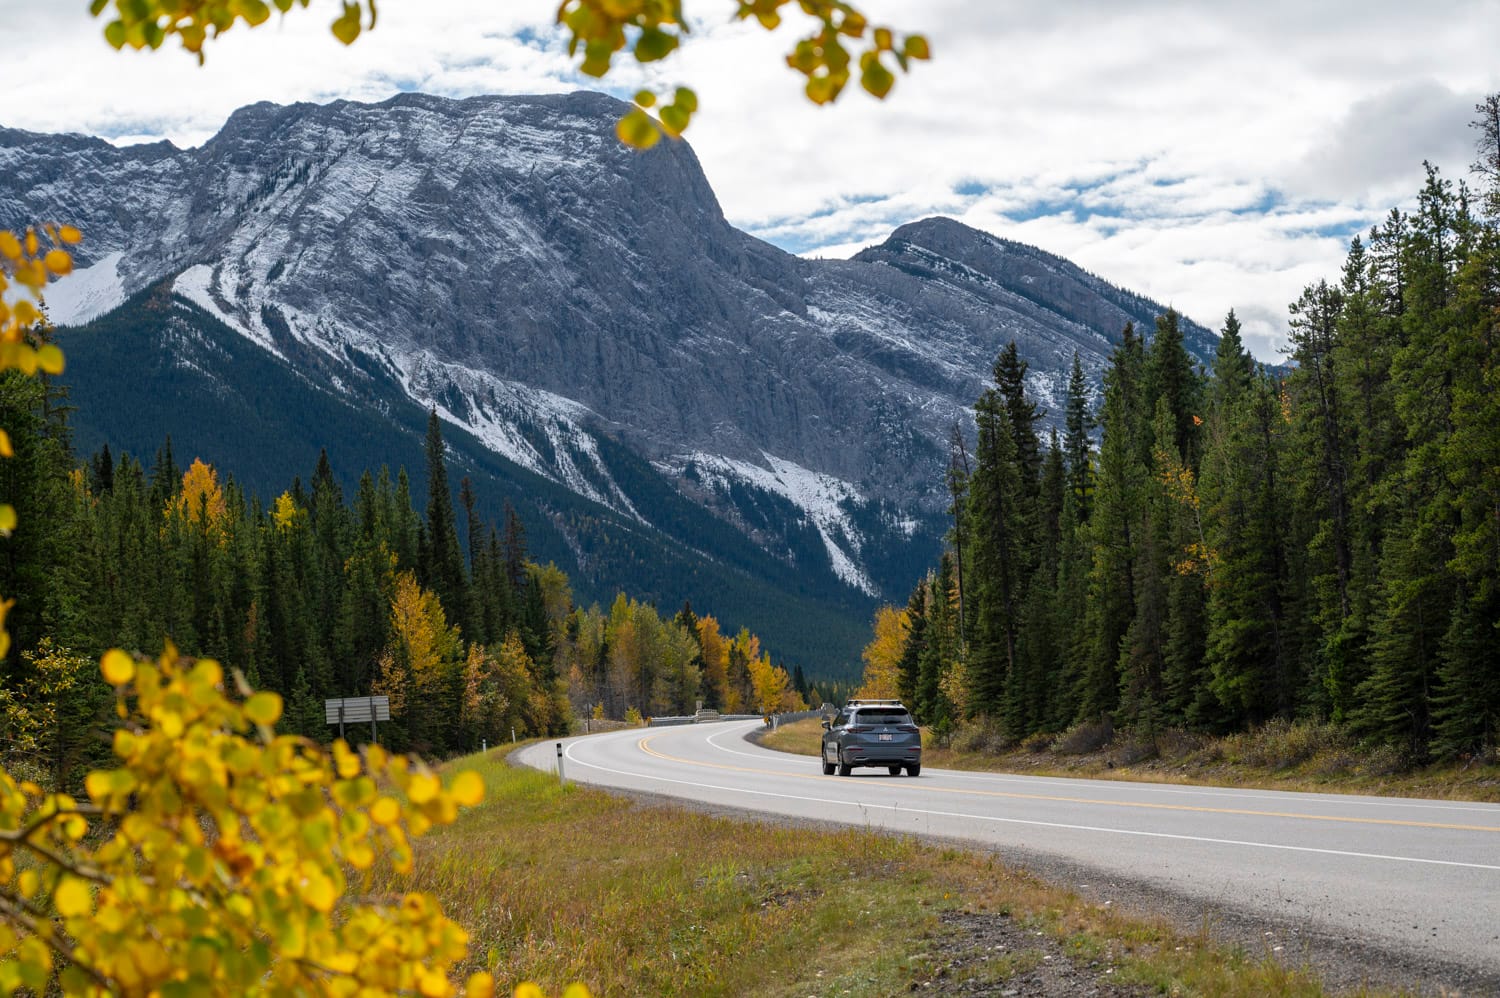
Mitsubishi Outlander 2025
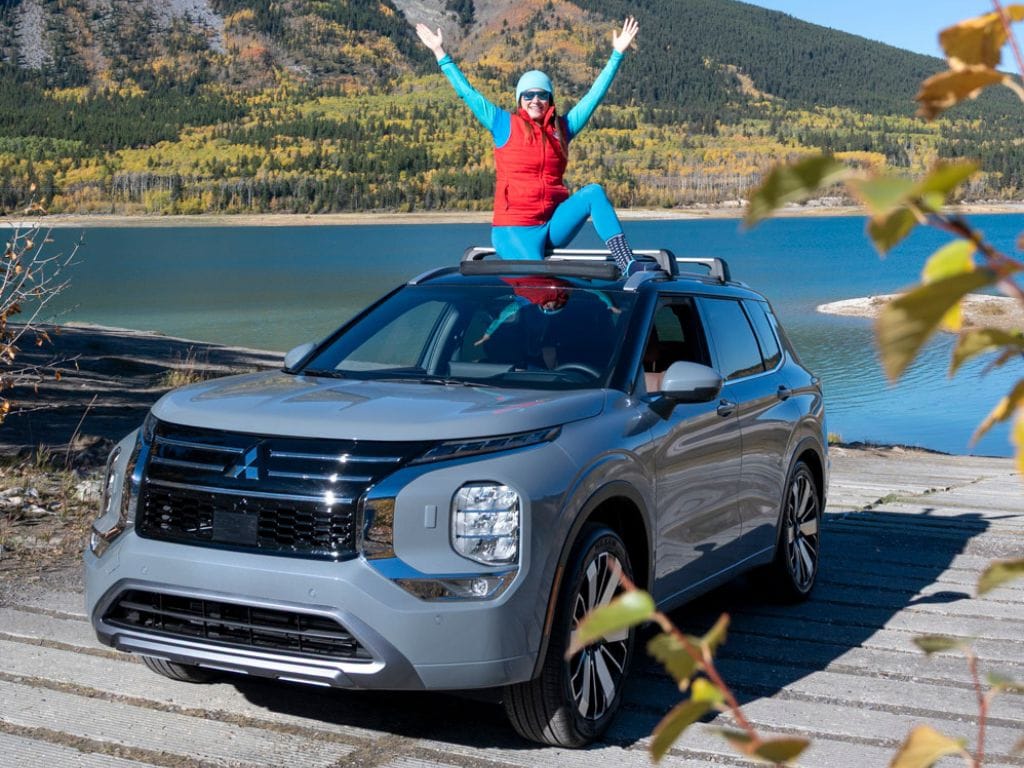
We were spoiled by Mitsubishi for this trip, as they loaned us a new 2025 Mitsubishi Outlander for us to head out to Banff to chase the fall foliage. This was my second time driving an Outlander, and I have to say, it’s the quintessential adventure buddy I never knew I needed. With Super All-Wheel Control and retuned steering and updated suspension tuning on the outside, plus a luxurious interior and bumping Dynamic Sound Yamaha Audio System, the Mitsubishi Outlander was made for road trips. And while I realize not everyone is going to get their own personal Outlander for their road trip, if you’re an adventure seeker like me, this is definitely a car worth checking out.
To and From Airport – Brewster Express
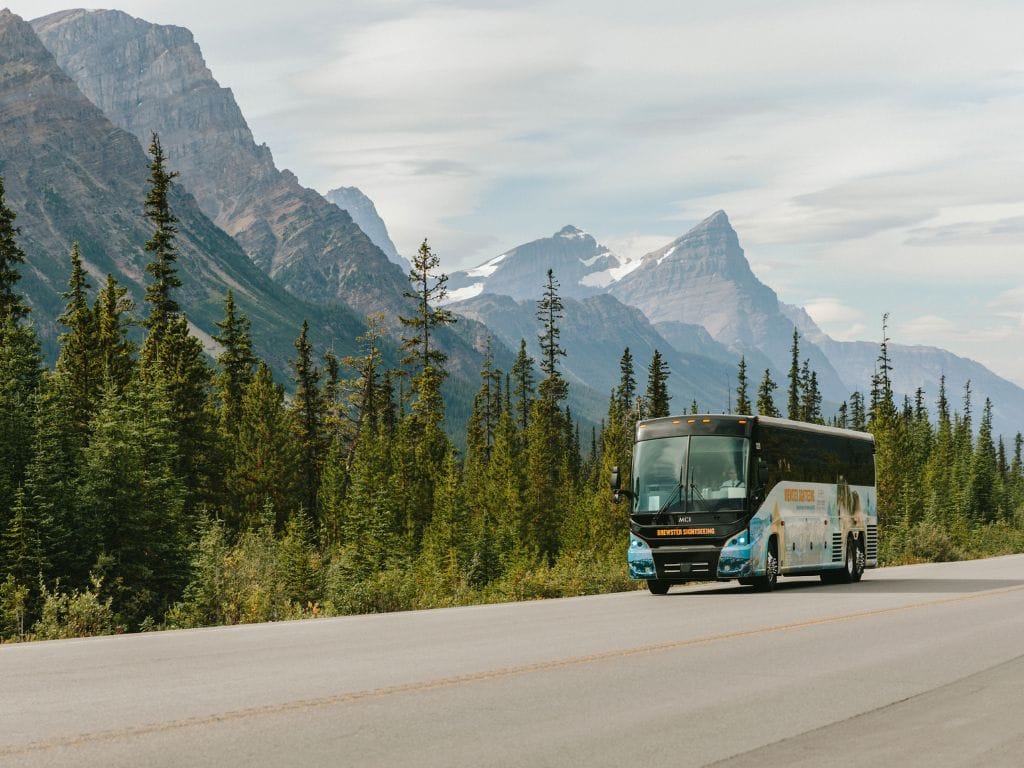
If you’re looking to head straight from the Calgary airport to your hotel in the Rockies, I recommend booking a shuttle with Brewster Express. They have regular departures from the airport and take you right to your hotel front lobby, allowing you to soak in the scenic views as you drive into Banff. Starting from $66.75 per adult one way (plus taxes & fees), you can sit back and enjoy the scenery out of the large viewing windows of the bus, while an experienced driver is at the wheel.
ROAM Transit
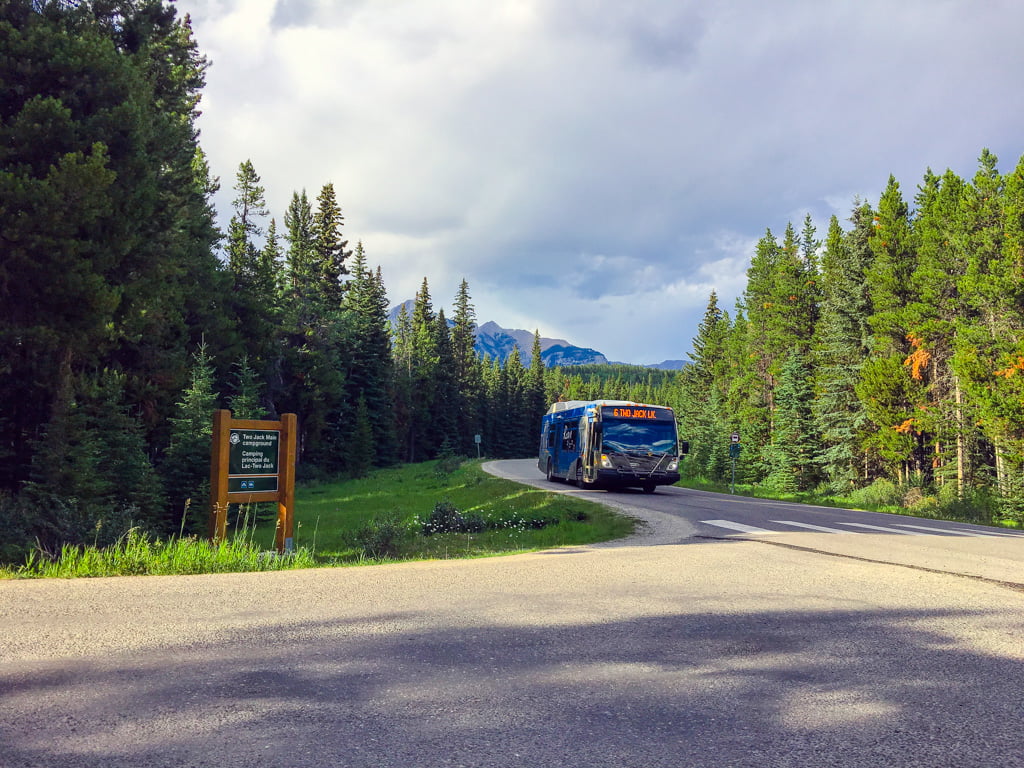
Once you’re in Banff, be sure to learn their fabulous public bus system offered by ROAM. This easy-to-use transit system centers around the main bus loop in downtown Banff, allowing you to get to any destination relatively quickly. If you’re looking to hit up some of the more popular destinations, like Lake Louise, you can even book ahead and reserve a seat (which we highly recommend!).
Parks Canada Shuttle Bus
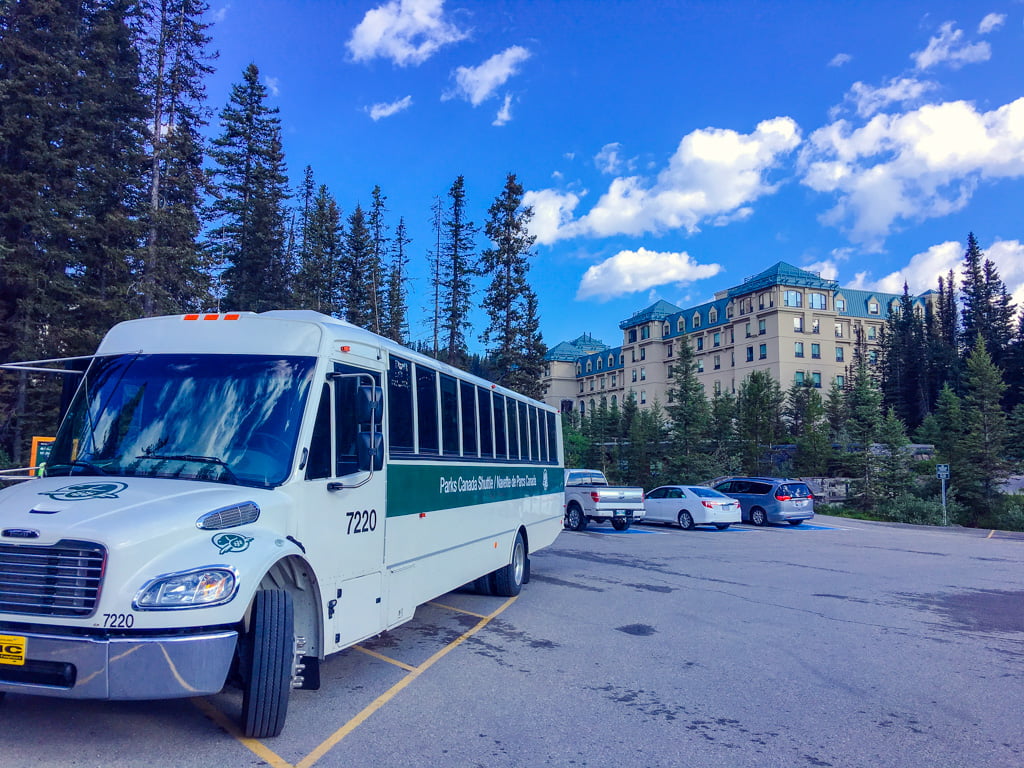
If you’re looking to access Moraine Lake, you’ll need to do it via shuttle, as the road is not open to public personal vehicles. The most cost-effective way to get there is on board a Parks Canada Shuttle. Larch season dates sell out fast, so it’s recommended that you book as soon as they open, in mid-April each year. They also open up last-minute spots that can only be booked 48 hours in advance, but they sell out in seconds, and so I wouldn’t recommend that route. If you can’t secure a seat on a Parks Canada Shuttle bus, your next option is to book a seat with a private shuttle company.
Moraine Lake Bus Company

We booked last minute with Moraine Lake Bus Company and therefore paid a premium ($110 per person) because there were only two tickets left. If you know your travel dates more in advance, then be sure to book your shuttle to secure the best pricing, as it is dynamic. I recommend booking the first shuttle in the morning and staying until the last one, as there are so many trails and beautiful sights to visit in Moraine Lake. It has taken me 5 attempts to get to Moraine Lake, as there was always something that went wrong, the weather, or personal circumstances. So when I finally got to go on this trip, I wanted to make the most out of it!
🎟️ Moraine Lake parking fills before sunrise — save yourself the headache and pre-book your guaranteed shuttle seat so your Banff trip goes exactly as planned.
Where to Stay
With so many accommodation offers in Banff, sometimes it can be hard to choose, so I’m going to tell you my favourite place to stay first, the Mount Royal Hotel.
Mount Royal Hotel

There’s nothing like working hard on a hike knowing that a rooftop hot tub is in your future, and that’s exactly why I love to stay at the Mount Royal Hotel. We had only been back in our room for minutes before we were showered and in our bathing suits, ready to head to the rooftop, to soak in the scenery, all while soaking out our soreness after an almost 15km day!
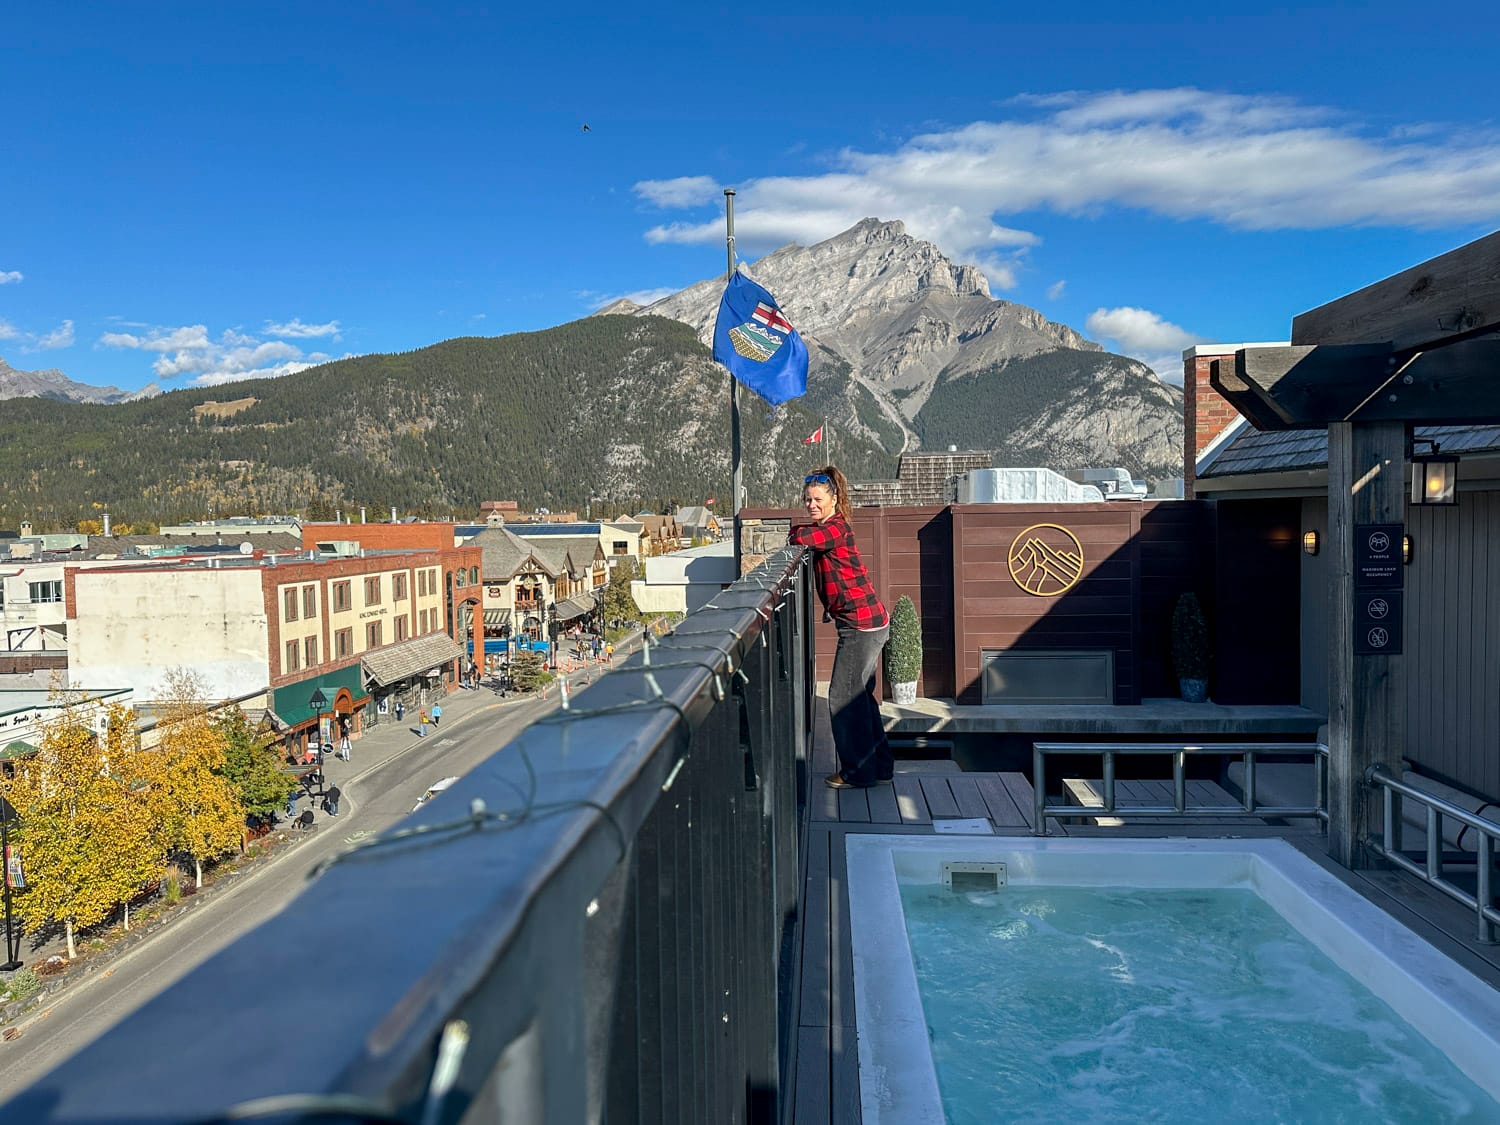
Originally built in 1908, this landmark hotel has been thoughtfully restored to celebrate its storied past while offering modern, elevated amenities—from cozy, design-forward guest rooms at what I consider to be the best location in Banff. At the intersection of Caribou and Banff Ave, you can step right outside to explore Banff Avenue’s shops, cafes, and trails, or head directly across the street and stock up at outdoor supply stores like Mountain Warehouse for essential supplies.
I consider myself to be a regular here, often recommending it to family and friends, not only because of the amenities and location, but because of the staff. They make you feel like you’re visiting a home away from home, always passionate about ensuring you have a wonderful experience and have everything you need during your stay. Comfort, Community, and Classic all wrapped up into one Canadian-infused stay.
🛏️ Planning a Banff getaway? Lock in your Mount Royal Hotel stay early — this central spot fills fast during peak season.
Elk & Avenue
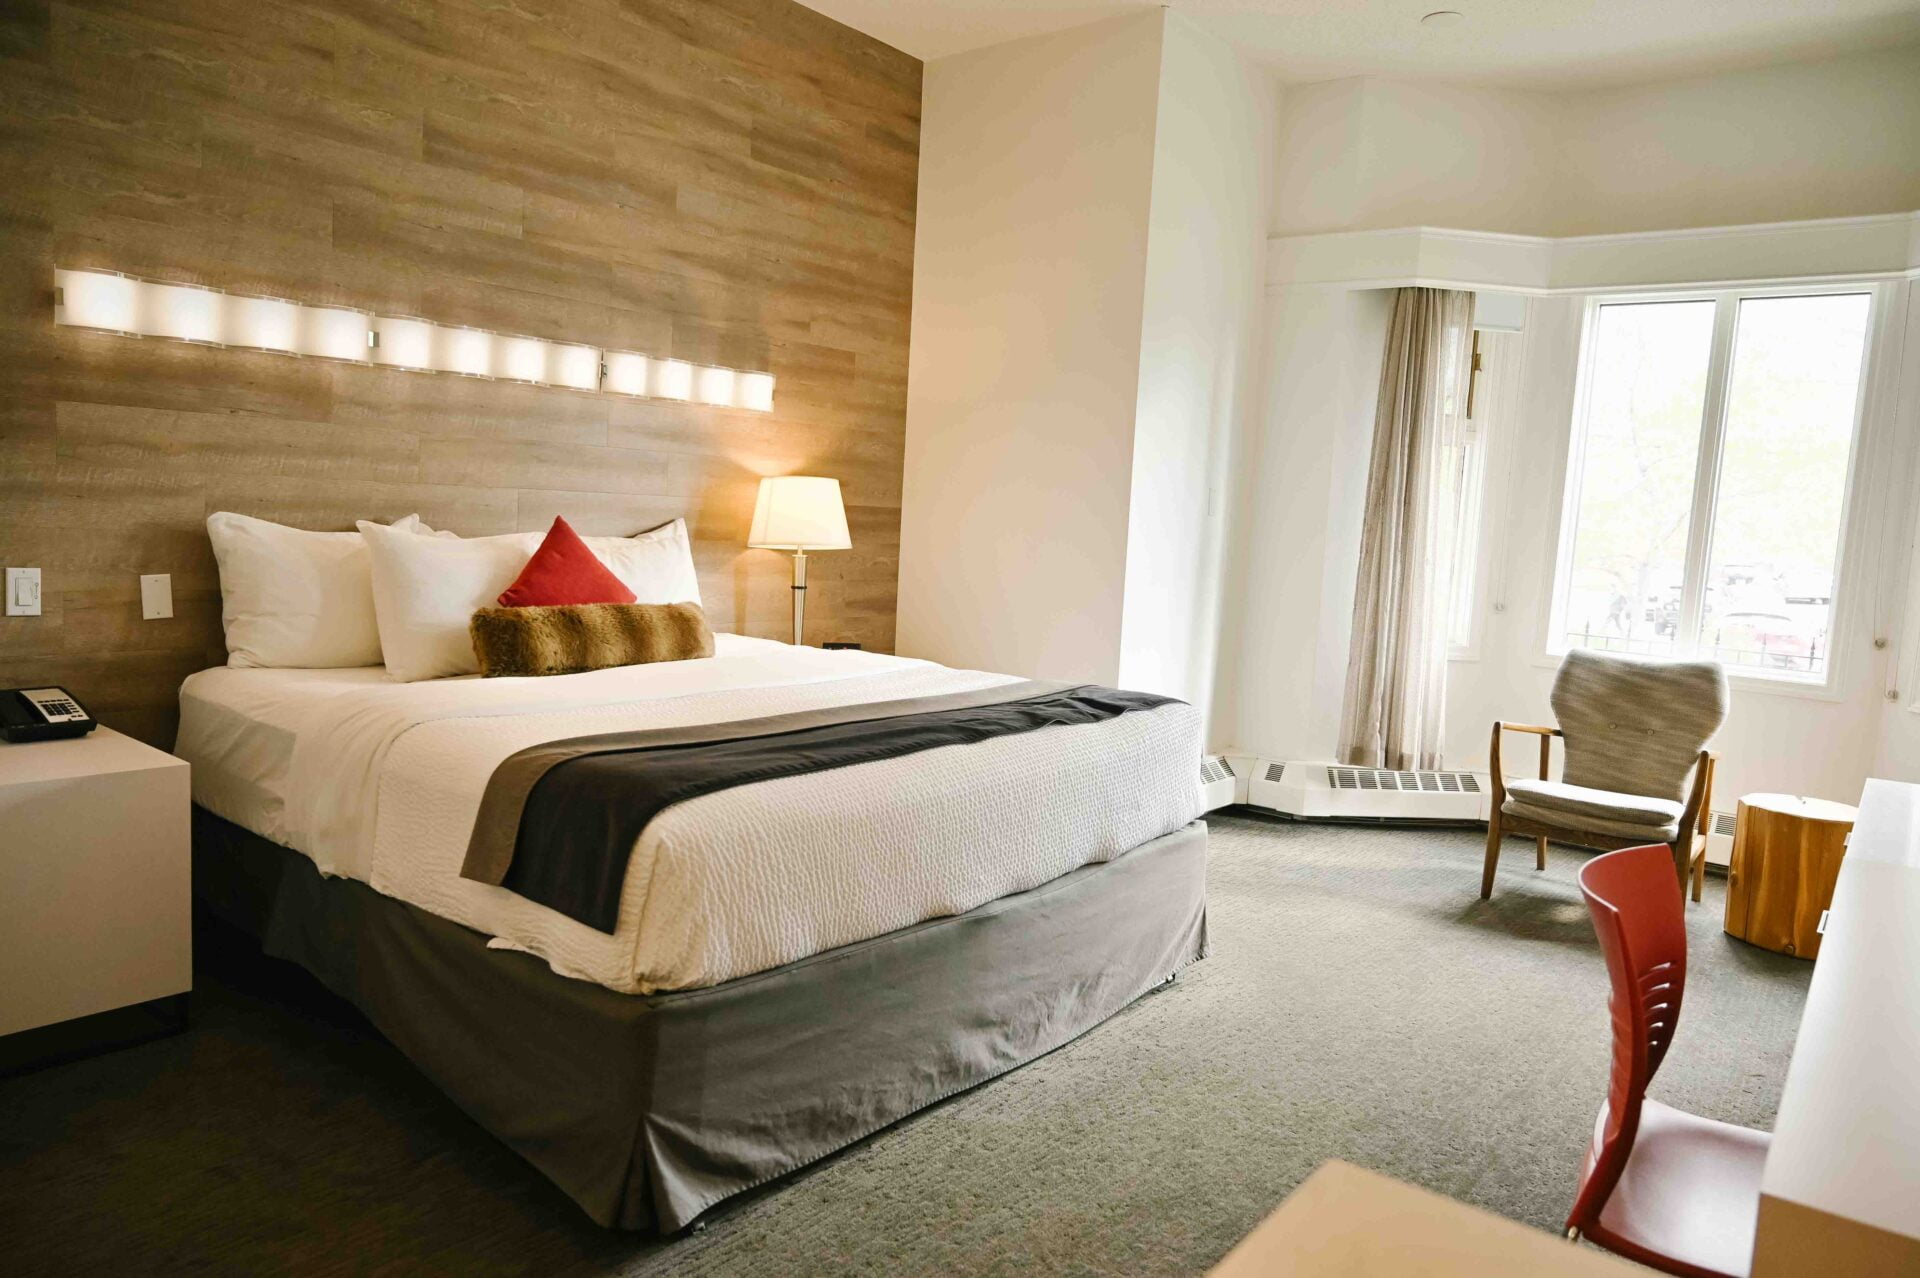
With a grocery store across the street and only a skip and a hop from the bus stop, The Elk and Avenue Hotel is another great property in Banff to book for your fall adventure. If you are looking for accommodations with a bit more space for the family to spread out, this hotel features loft rooms, deluxe 2 queen rooms, as well as junior suites (plus children stay free!).
🏔️ Stay right on Banff Avenue and walk everywhere — check availability at Elk + Avenue Hotel before your travel dates sell out.
Glacier View Lodge
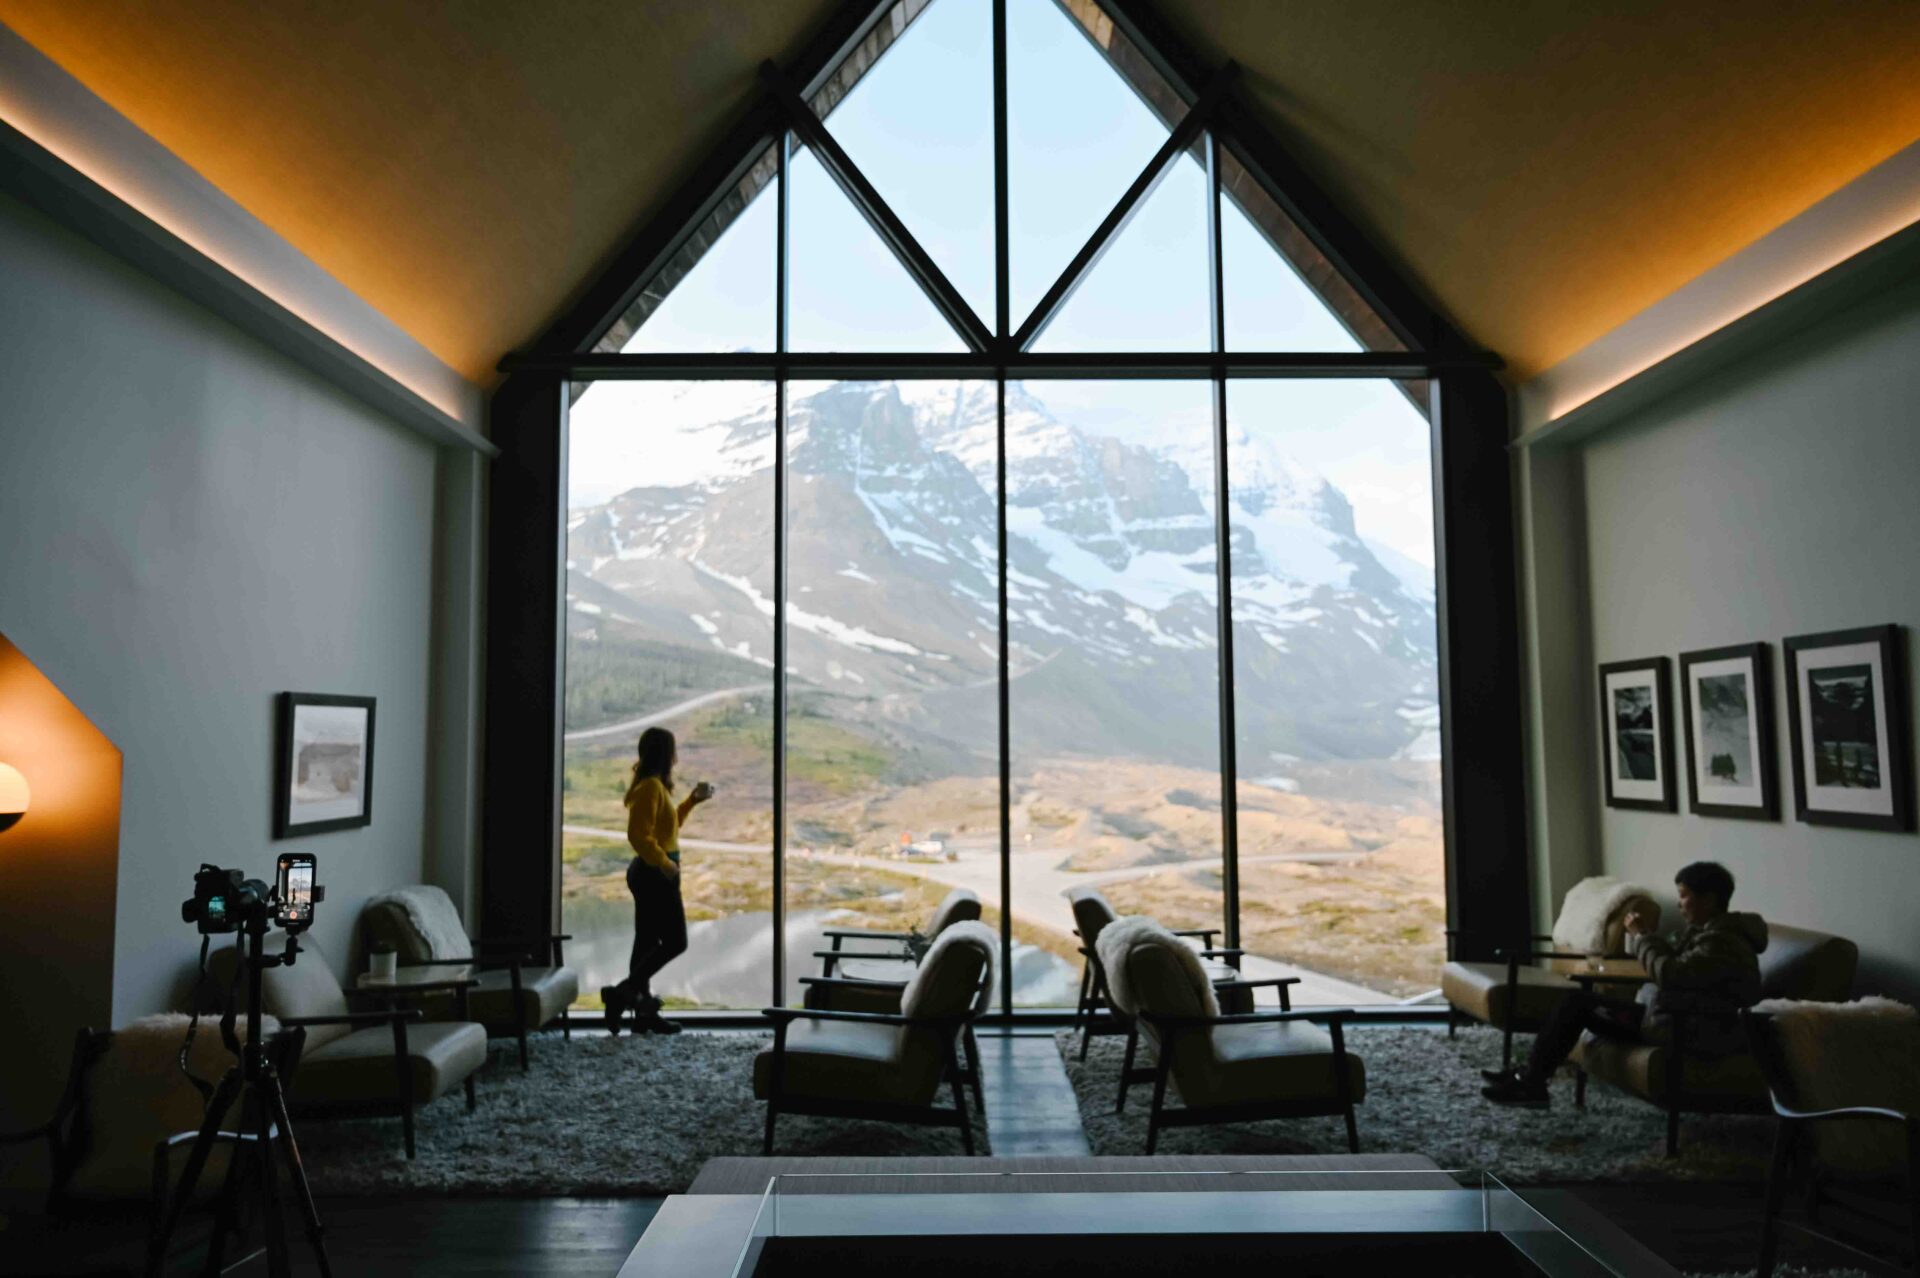
Are you looking to splurge and have a luxury sleep at the foot of a glacier? Then book a beautiful room at the Glacier View Lodge, a 1.5-hour drive north of Lake Louise. A stunning mountainside experience that is bucket list worthy, a stay at the Glacier View Lodge is elevated in more than one way.
From the moment you walk out into the lobby and soak in the two-story views out over the Athabasca Glacier, you connect with the land in a deeply inspiring way. Check out my full review and more photos.
🏔️ Stay right at the Columbia Icefield and wake up steps from the Athabasca Glacier — check availability at Glacier View Lodge before your dates sell out.
Where To Eat in Banff

There’s nothing like a delectable, fueling meal after a day of adventures and foodies and connoisseurs alike will appreciate the food scene in Banff. From casual affairs to luxury experiences, dining out in Banff isn’t easy as there are so many delicious choices to choose from. When I’m visiting, I always tend to go to my favourite places:
Wild Flour Bakery
My first stop in Banff is always Wild Flour Bakery, where I stock up on gluten-free muffins and treats. Ironically, this is also my last stop before I leave Banff, as I stock up on supplies like their gluten-free bread, muffins, and date bars before I go home.
But if you’re not gluten-free like me, not to worry, this bakery has it all! Often lined up out the door for good reason, their menu offers sweet and savoury pastries, handmade sandwiches, delicious loaves of bread, and all the assortments of drinks you’d expect in a crafted coffee house.
Brazen
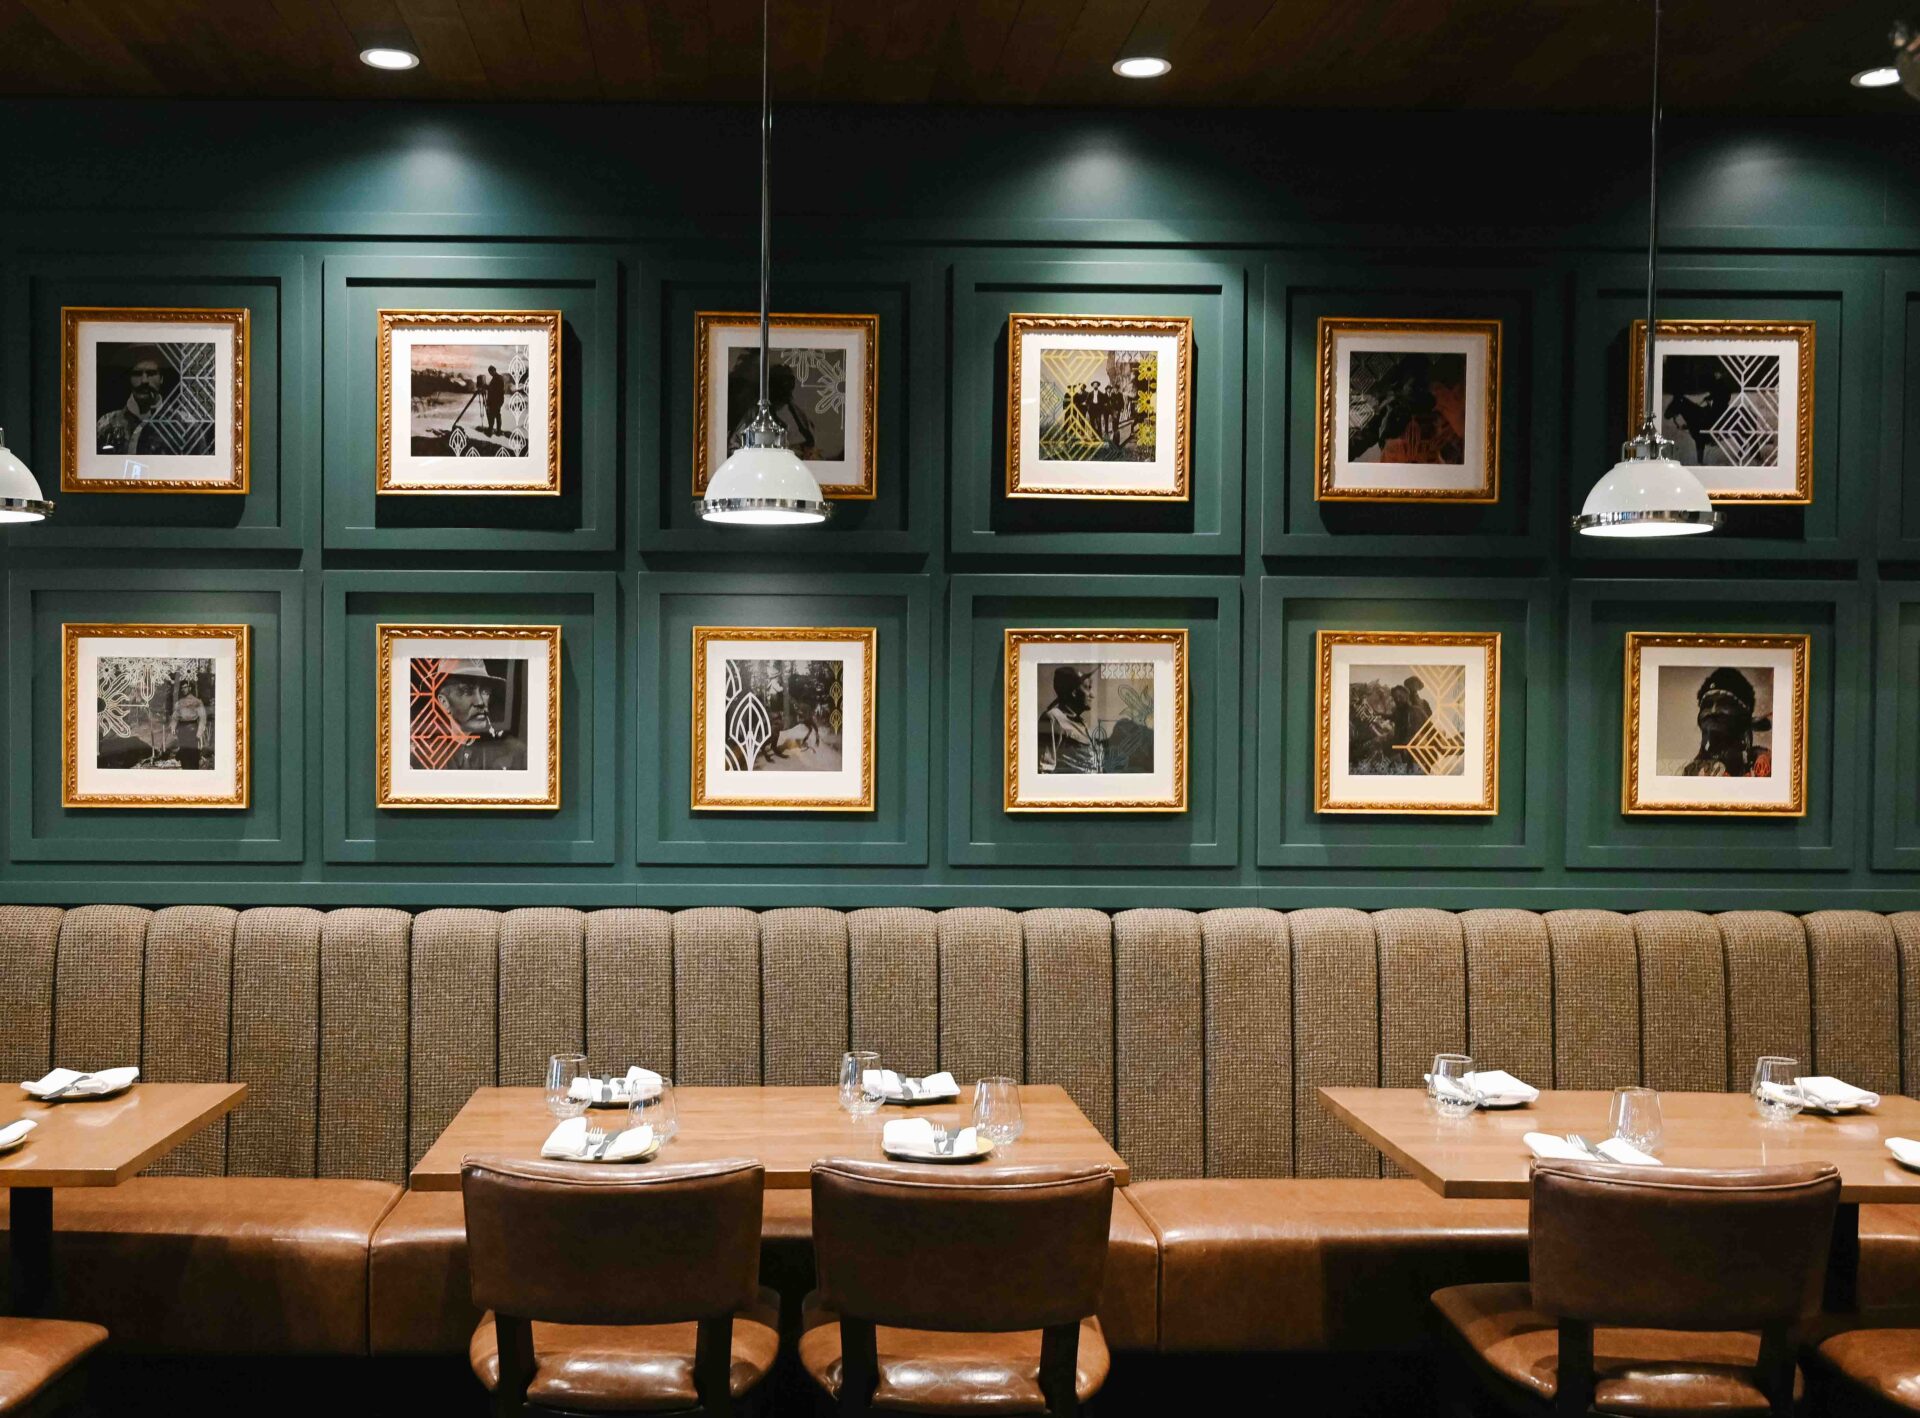
If you’re staying in the Mount Royal Hotel, Brazen is connected through the lobby, but if you’re not, this is worth making a reservation for! Some of the most fanciest meals I’ve ever eaten were at Brazen, mixing art and flavour before me in a way I had never experienced.
Brazen offers a “contemporary take on old-world classics,” with elevated menu options for breakfast, lunch, and dinner. I love starting my morning there with their hearty breakfast (their avocado toast is the perfect fuel for an adventure day). And for dinner… I recommend their beef tartar! It was half show, half meal, and unlike anything I had ever experienced!
Hello Sunshine

If you’re looking for the perfect place to take your crew that mixes tunes and good food, it’s Hello Sunshine. A truly unique atmosphere of modern decor mixed with comfort greets you as you check in with the hostess. I love to order a variety of meals to share so that everyone can indulge in a variety of flavours during the meal. As elevated as the decor and meals are, we found the pricing to be really good, so we definitely recommend it if you’re looking for an experience and a meal all in one.
(And if you have a group, be sure to book Karaoke!)
Three Bears Brewery & Restaurant
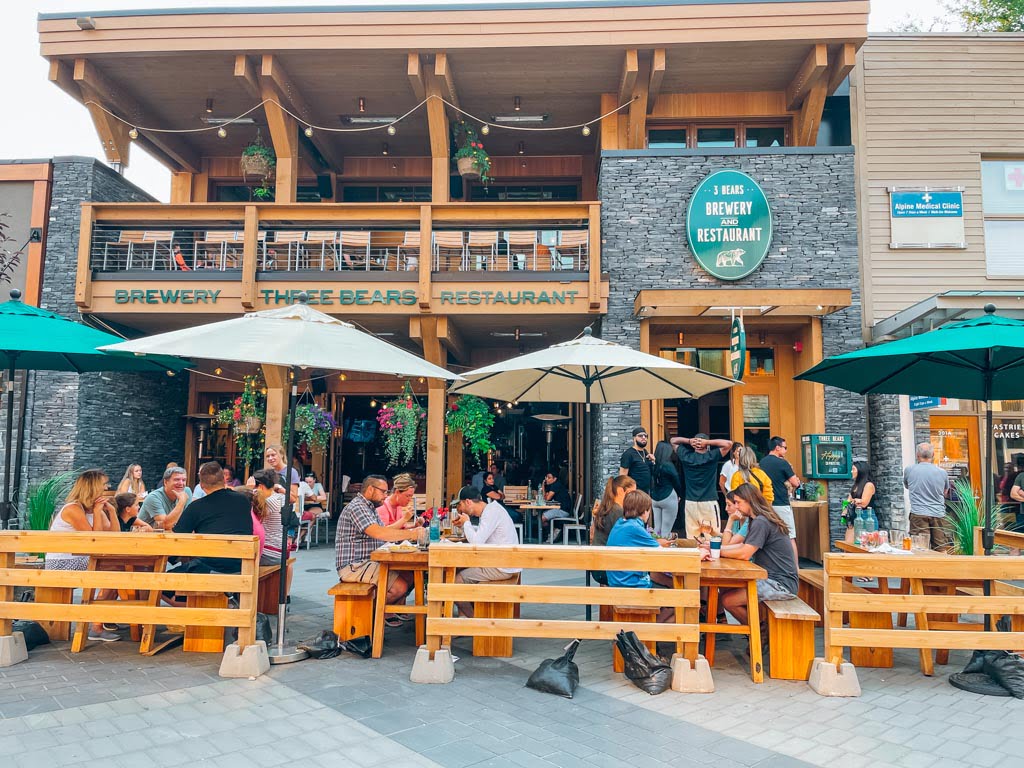
Three stories of good food and great brews, Three Bears Brewery & Restaurant is an icon and one of Banff’s busiest restaurants, for good reason. From their wood-fired pizzas to their double-stacked burgers, this is soul food and adventure fuel at its finest. While you’re there, be sure to strike up a conversation with the staff, one of the friendliest groups in the industry that always seems so passionate about your guest experience.
What to Wear for Larch Season In Banff
If you take away one word from this article, let it be this. “Layers!”
The fall season lacks predictability, and the weather in the mountains can change dramatically in an hour. Mix that in with your elevation gains and sweat as you ascend higher on the mountain, and you’ll be playing the layer on, layer off game before you know it. However, once you reach the peak of your hike and settle onto a comfortable stump for a sit, you’ll be grateful for the ability to throw on an extra layer or two to keep you warm. So yeah… layers are essential!
Layer Up!
Base Layer:
This is the layer that is closest to your skin. It should be tight-fitting and wick away sweat to keep you dry and comfortable. Think merino wool or synthetic materials, avoid cotton as it absorbs moisture and will make you cold.
Mid Layer:
This is a layer that is designed to trap heat and provide insulation. It can be fleece, down or synthetic materials, as it should breathe to allow for airflow, but also insulate you more than the first layer.
Outer Layer(s):
This layer should be insulating and wind/water resistant (or bring two separate jackets that layer like I did).
Stay Warm, Stay Safe: More Hiking Must-Brings
- Hiking shoes or boots. Running shoes could work in the dry season, but if you come up against mud or snow, they will be too slippery. Think footwear with traction.
- Quality hiking socks – Good socks = no blisters. I recently found Outway socks and have fallen in love. Not only do they come in a variety of styles and patterns/colours, but they are a Canadian company!
- Gloves – for chilly mornings or when you stop and rest.
- Touque or Hat – Something to keep your head warm. I recommend a touque so that you can also keep your ears warm.
- Buff – I love myself a buff, not only does it keep your neck warm, but it also can be pulled up over your lower face to keep your chin & nose warm, or used as a headband to keep your ears warm.
- Fitted Backpack – A pack that is fitted can make the longer hikes so much more enjoyable. You’ll need one with enough space to store your essentials and emergency gear.
- Fanny Pack – I love hiking with a fanny pack to allow for quick access to items like chapstick, camera battery, gloves, and of course, trail snacks!
Trail-Ready: The 10 Essentials (plus a few extras) You Should Never Forget
No matter the time of year, these are the items you should always carry if you’re heading into the backcountry (in addition to the layers that I mentioned above). This list includes the 10 essentials that are recommended by local Search & Rescue organizations, plus a few extras that I’ve learned in my years of hiking.
- Adequate Water – don’t rely on streams, especially in the fall when they may have dried up.
- Bear Spray – You can rent, borrow, or buy bear spray.
- Navigation – (All Trails, with map downloaded). Even though trails are easy to navigate and well-marked, it’s best practice to be able to navigate yourself, and it’ll allow you flexibility with your scheduling if you can mark your travel time and elevation.
- Whistle – I have one that is attached to the front of my pack that I can easily blow if needed.
- Power Backup – I have a solar-powered unit that I can recharge when hiking. With the stunning scenery that is set in cooler temperatures, batteries tend to die faster than normal, so having a backup power source for navigation and photos is a good idea.
- Snacks – I fully plan out meals and snacks when we’re on the trail. I aim for healthy and nutritious meals, and they always taste better on the trail (and my body appreciates the nutrition versus fueling it with junk food).
- Layers – as if I need to repeat myself, oh wait, I will.
- Sunscreen – I got a sunburn. In October. On a mountain. Yup… wear sunscreen!
- Knife – An essential tool for everything from opening packages to first aid emergencies. Remember, you can’t carry this on your flight, so check it in your luggage!
- Waterproof Matches/Lighter – a way to start a fire should always be in your pack.
- First Aid Kit – accidents can happen on the trail, from minor cuts and scratches, to twisted joints, a first aid kit is key to have.
- Emergency Blanket – these small but mighty emergency blankets can be used to stay warm, as a shelter and as a signalling device.
- Headlight – I actually didn’t bring one, but had two emergency lights in my pack. But we arrived before sunrise, and my well-educated hiking partner pulled out her headlamp and led us down the dimly lit trail (so pack a headlamp, extra batteries, AND a smart hiking partner!)
- Emergency Connection – If you required assistance and there wasn’t any cell phone reception, would you have a way to call for help? I travel with an InReach by Garmin that allows me to send check-in updates to my family and friends, as well as activate an SOS should I need support.
Other Fall Adventures Worth Checking Out In Banff
Parks Canada

Banff National Park is home to countless other locations for outdoor activities. Lakes for paddling, parks for picnics, waterfalls to explore, Indigenous walks, a plethora of hiking trails (for all levels and abilities), mountain biking, and so many outdoor gems to discover.
Parks Canada also operates historic sites and attractions around Banff that are worth adding to your trip. Some of our favourites include:
- Cave and Basin National Historic Site – Did you know this is the birthplace of Canada’s national parks system? Learn about thermal mineral springs through their interactive exhibits and interpretive boardwalks.
- Banff Park Museum National Historic Site – This century-old natural history museum showcases wildlife and geological specimens, with the building being a heritage landmark from 1903.
Banff Upper Hot Springs
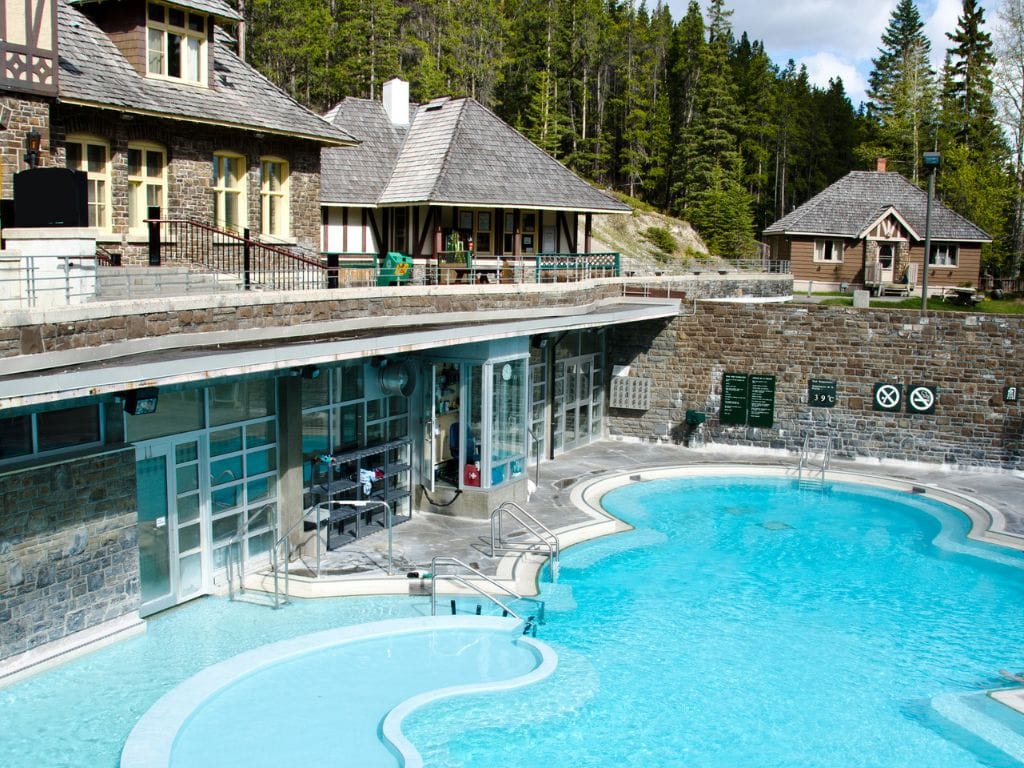
If you’re looking for a historic hot tub and a post-adventure soak, check out the Upper Hot Springs in Banff. Besides helping your body recover by easing sore muscles, improving circulation, and promoting relaxation, it’s simply a serene, scenic experience: you can sit in the steaming water while gazing at Mount Rundle and the surrounding Rockies. Want to take the nostalgic route? Rent one of their historical bathing suits!
Banff Gondola
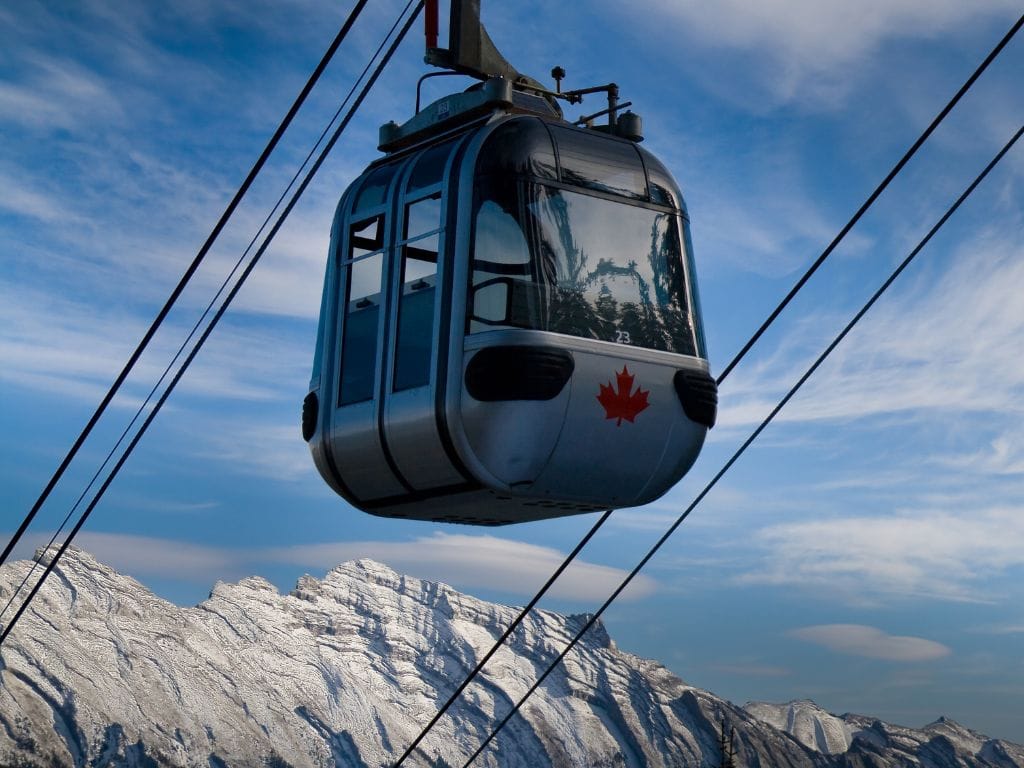
If you want to head high into the mountains but don’t want to hike yourself up there, check out the Banff Gondola. After soaring to the top of the mountain, 2,281 metres above sea level, you’ll be surrounded by six scenic mountain ranges. These 360 degree views also include the breathtaking town of Banff, the Bow River and many lakes off into the distance.
We’ve all heard of sunrise, but have you heard of Nightrise? Head up the Banff gondola before the sun has set and you’ll get to see the most beautiful sunset from the best view in Banff, and take in the rising of the moon, known as Nightrise. Nightrise is a multimedia experience that showcases storytelling, interactive lights, sounds, and music while you navigate through three stories of exhibits.
🚠 Don’t leave Banff without seeing those 360° mountain views — reserve your Banff Gondola ticket now before prime time slots sell out.
Other Helpful Insights
Fall Photography Tips
- If you’re doing the Larch Valley Hike, be sure to get the earliest shuttle and head up to the mountain top as soon as you get to Moraine Lake. Plan to spend your afternoon at Moraine Lake when the mountains are lit up and the morning among the larches, with little to no crowds!
- These hikes have so much to look at that sometimes the best views are actually behind you. Take time to pause and survey the landscape to make sure you’re not missing a reflection or light that you didn’t think about.
- Golden hour is worth learning about (the hour before sunrise and the hour before sunset), where you get the best light. This is a perfect time to step outside your hotel in Banff and take pictures of the downtown sights without having to worry about too many people being in your photos.
- Bring a tripod if you’re travelling solo and want pictures of yourself in the mountains. Take the time and capture the shot. Future you will thank you for the hassle
- Use Instagram to research and follow inspiring Banff photographers like Mitch Popilchak and Paul Ziska
Budget
Here’s a high-level overview of what it costs (approx.) to head to Banff for four days during larch season:
- Flights: Varies based on where you depart from. From Abbotsford, flights were approximately $250/person (based on booking in advance and with a sale).
- Bus Transport to Banff from Calgary Airport: Starting from $66.75/adult one way (plus taxes & fees)
- Public Bus Around Banff: $5/adult for a day pass
- Shuttles to Moraine Lake: $110/person
- Hotels: $500/night
- Food: We did a mix of splurging at our favourite restaurants and then saving and making our own meals on the trails. We averaged $20-25/person per day.
- Travel Insurance: this cost vastly varies, best to be in touch with your insurance provider.
- New Mitsubishi Outlander: I mean… if you’re in the market, why not! $35-46K
Adventure is out there, and chasing the larch season in Banff is the perfect way to experience a bit of mountain magic. While we showcased our favourite trails to choose from, there are many more worthy of note, so have fun researching and planning the perfect trip that suits your timeline and adventure level. We went for 4 days and 3 nights, but honestly could have stayed a whole week exploring the region and have already started dreaming of our next trip back (…cough…Abraham Lake in the Fall!).